
Aldwych Tour
On Friday, 15th November 2013, as part of a tour run by London Transport Museum, I paid a visit to this curious branch station that last saw passenger service in September 1994. This not only included the platform that had been in use until the station’s closure, but also included a visit to the station’s second platform that closed in 1917 and was subsequently used for trialling platform designs that would subsequently be employed on stations elsewhere on the network. Parts of the station that had never been opened to the public were also included in the tour.
Additional photographs from a second tour that occurred on the 5th August 2022 are included here too. By then, some of the areas covered on the original tour (for example, the parts of the station that were never opened to the travelling public) had been excluded, on safety grounds.
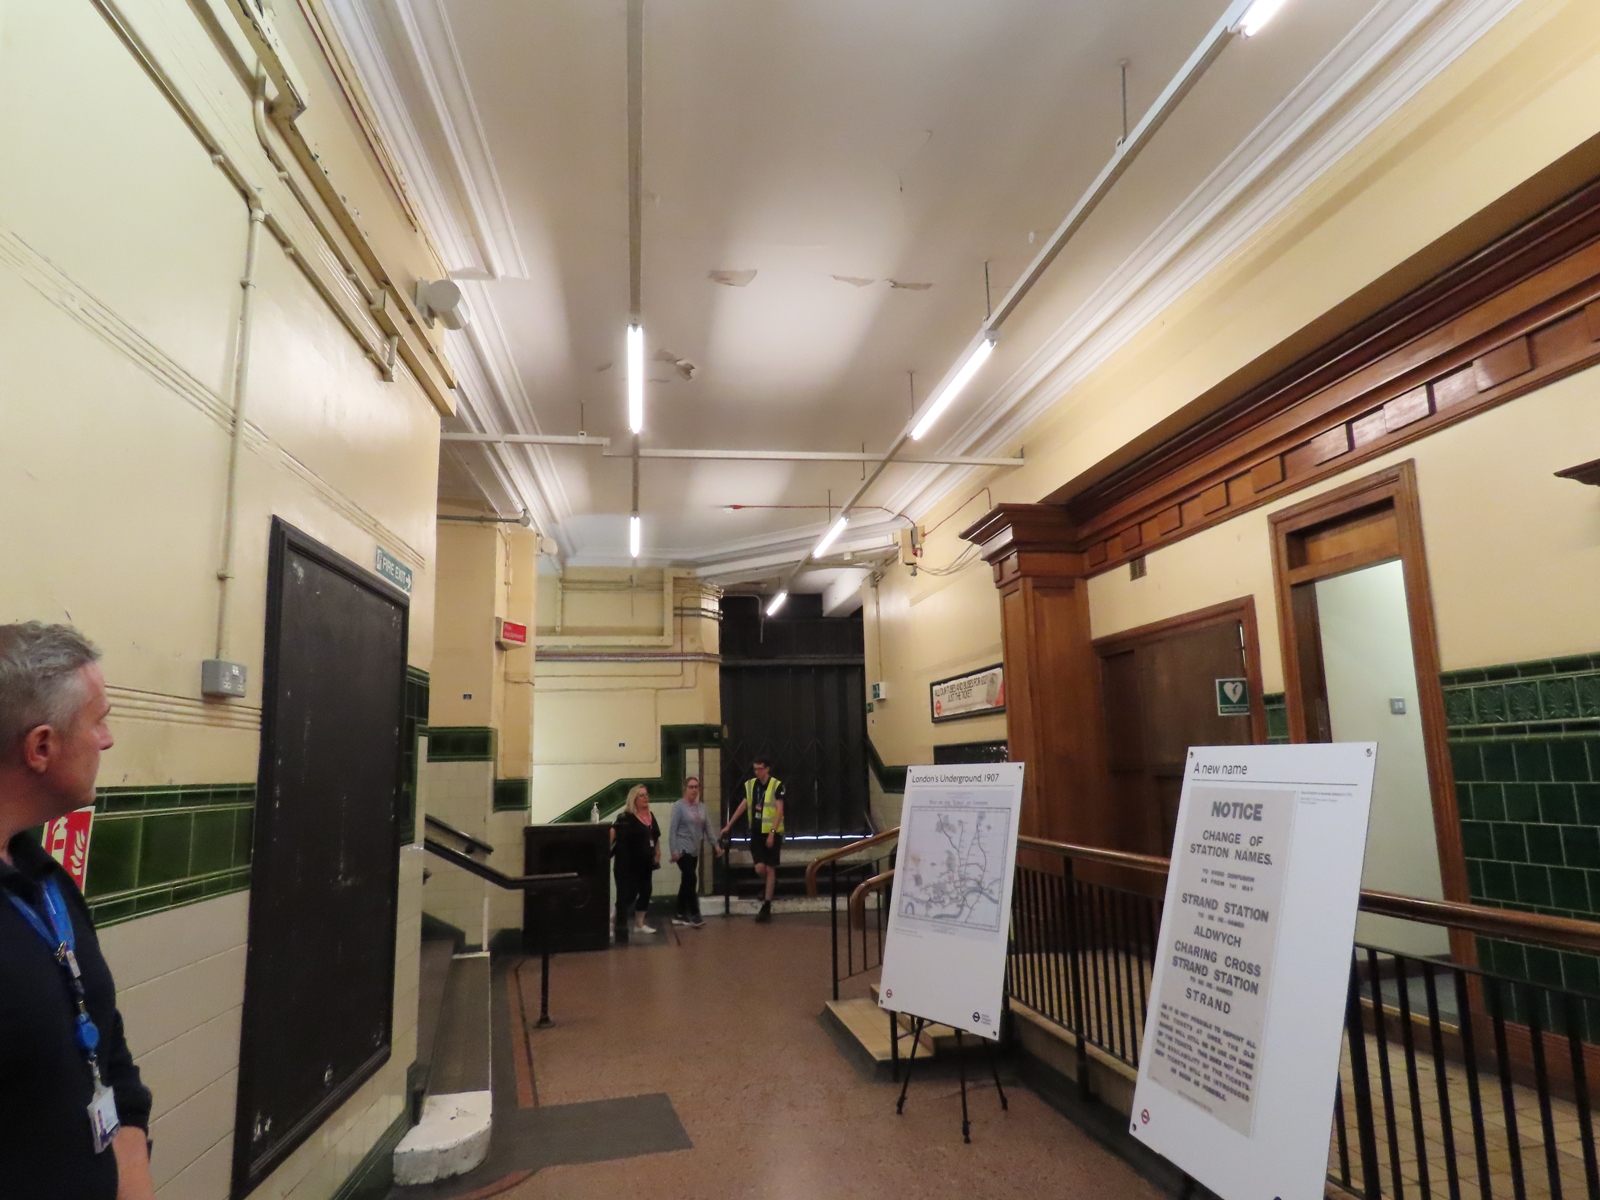
The tour commenced at the station’s Strand entrance, as opposed to the larger entrance that is located around the corner, on Surrey Street. We headed along the concourse in the direction of the former ticket hall area, where we met Dave, our guide for the tour.
Dave provided us with a brief history of the station before we headed down to platform level by means of the emergency spiral staircase behind us.
The 2022 tour commenced (and ended) on Surrey Street; the Strand entrance being closed off - possibly, owing to the state of the ceiling in this area.
Looking back towards the Strand entrance (up the stairs to the left), with the spiral staircase and Surrey Street entrance in the background, and 1980s’ replacement ticket office on the right, the long setback between the entrances and the lift access is obvious.
We re-assembled on the lower lift landing where we were invited to peer through the grilles and view the cavernous lift shafts beyond.
A catwalk had been constructed across one of the shafts, allowing access to part of the station that never opened to the public - a feature of the Yerkes-funded stations being the provision of a one-way system for passengers. As passenger usage was anticipated to be low from the outset, what would have been the entry passages for passengers entering the Underground system were never furnished; the exit passage being deemed to suffice.
The other shaft lies empty.
![]()
Dave explained that the condition and age of the lifts played a significant part in the decision being taken for the station to close
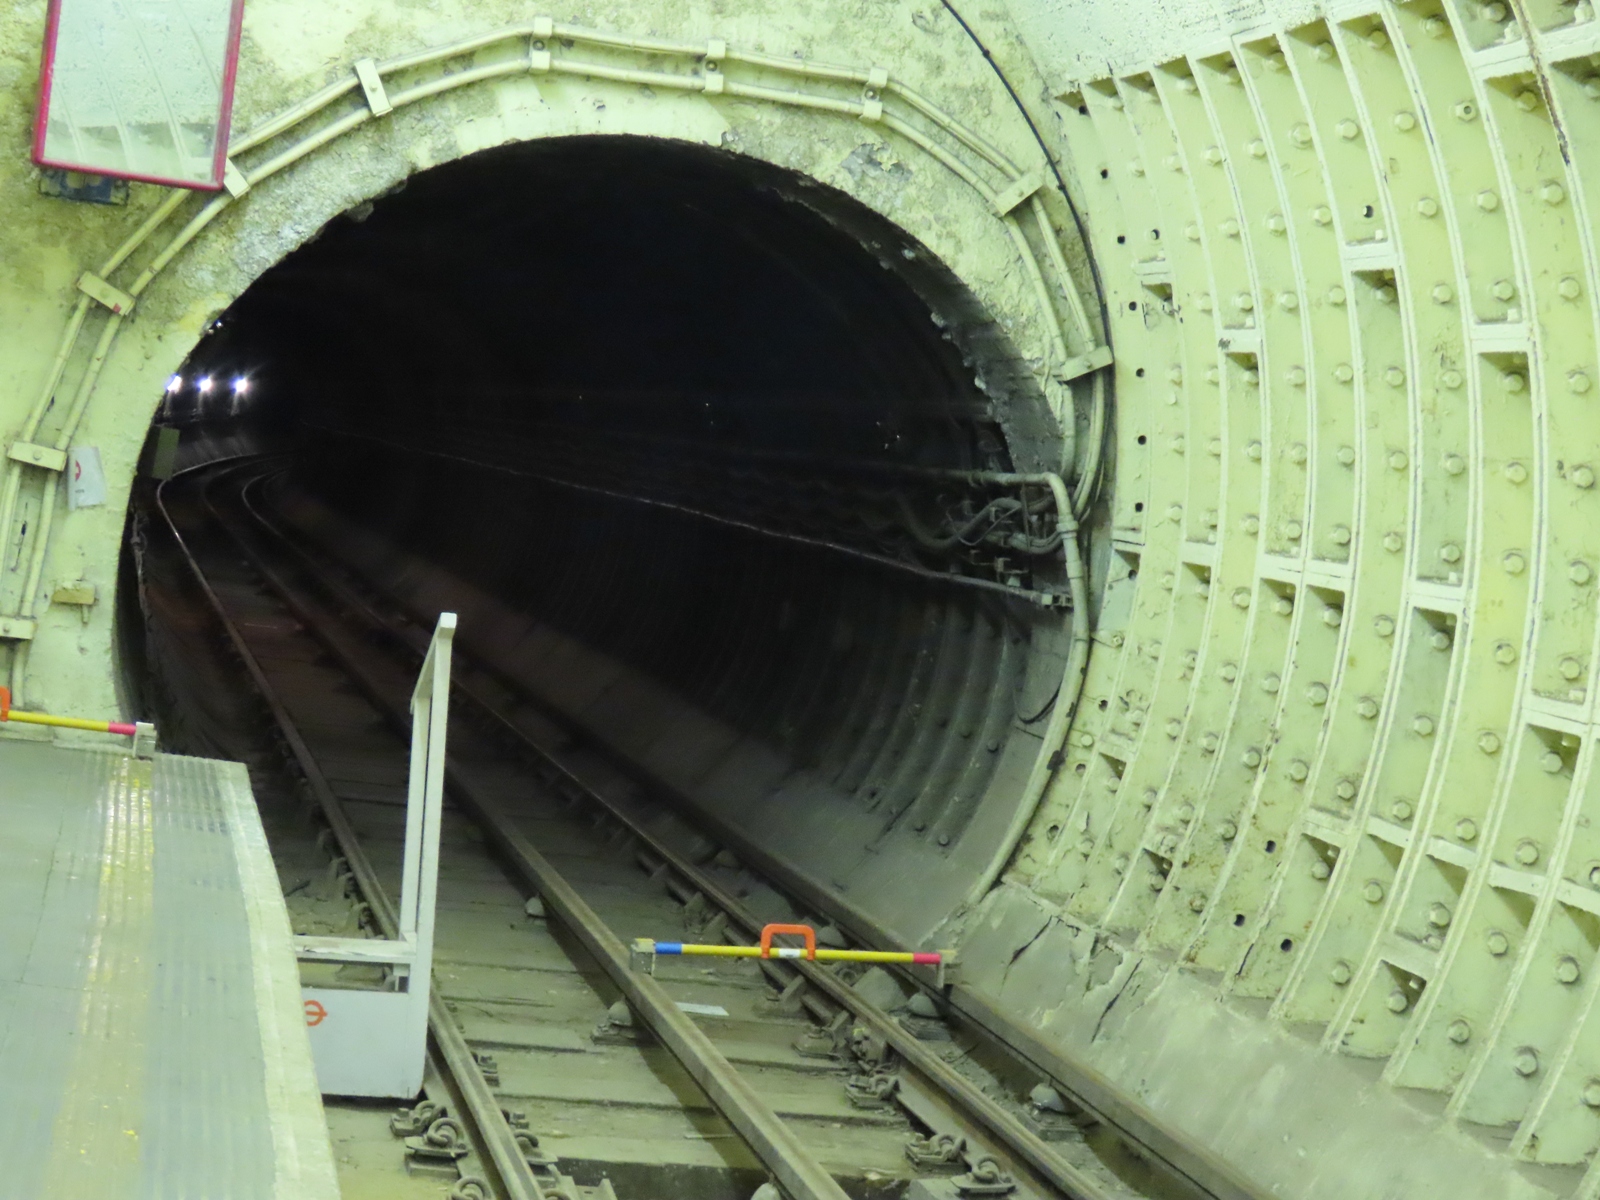
We then walked along the passageway in front of us, before descending a short flight of stairs and arriving at the platform that remained operational until 1994.
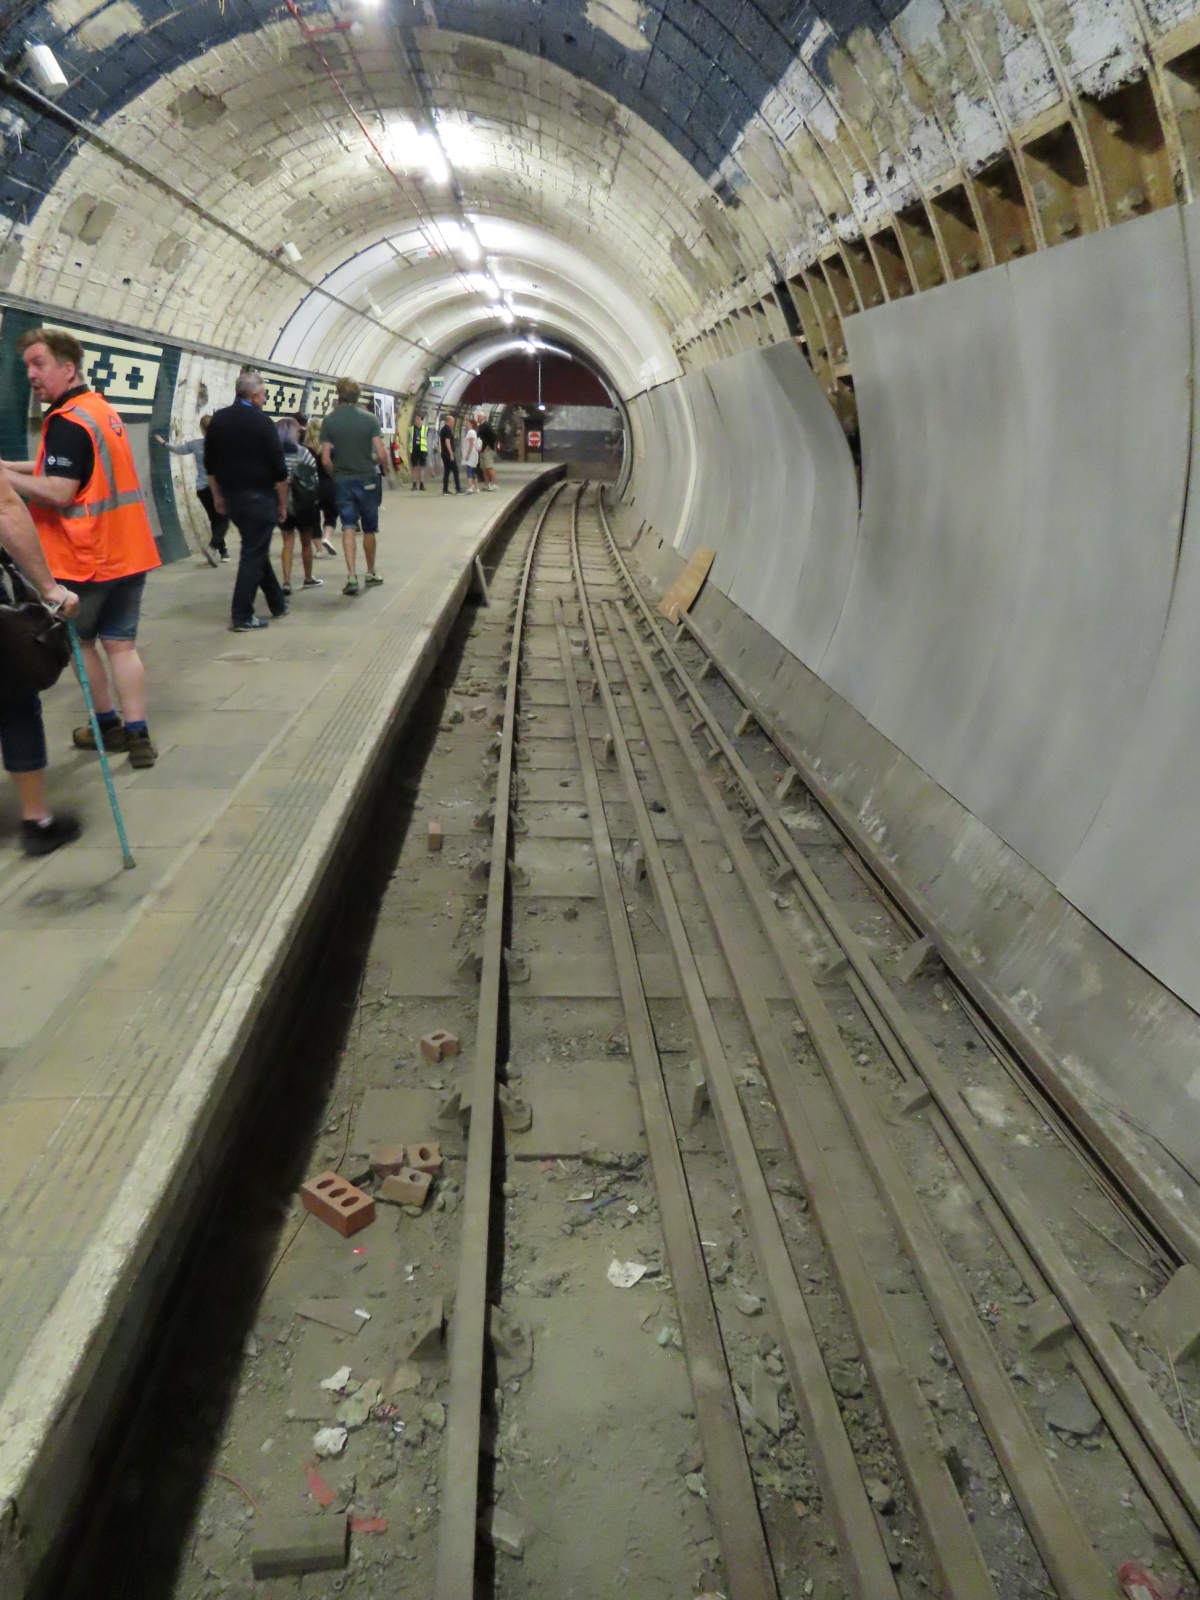
Although this view creates the impression of a through station, in reality, this is simply a run-off tunnel, which ultimately ends in a solid brick wall. Notice the Short Circuiting Device that is placed across the conductor rails.
This door leads to more of the never-opened parts of the station. Had all of these passageways been brought into use, this would have been the entrance to the platform.
The panelling against the platform wall is a modern (post 1994) addition.
The Holborn end of the platform. The red-framed object attached to the headwall is a mirror that would have allowed the driver to see back along the length of the train and ensure that they weren’t about to close the doors on someone. When in use, the mirror would have been at a different angle to how it is positioned now - the current angle is too sharp to allow a backward view to be seen.
A similar view in 2022. The SCD is visible here this time.
Notice the abrupt end to the tiling rings here. This section of the platform was closed off to passengers for many years, with trains pulling up to the far headwall. This was later changed, in order that they would instead stop short of this headwall but be up against the other one, necessitating the opening of this section of the platform for passengers.
The deactivated trainstop can be seen between the platform edge and one of the running rails.
When in use, the trainstop arm would be raised as a train approached the platform. If the train were travelling above 10 mph, the arm would remain raised, and would strike the train’s tripcock,. which would apply the brakes automatically - a feature introduced in the wake of the Moorgate disaster in 1975.
The two fixed red stop lights remain present on the ground beneath the negative conductor rail. Of course, when in use, these would be positioned vertically.
The solitary platform waiting bench.
Another mirror is positioned on the corner of the exit tunnel. Notice here that the ‘tiled pattern’ is actually just green paint - the original tiles having been whitewashed over in the past.
From here, we then headed back up the short flight of stairs, and turned left through a doorway, in order to reach Platform 2.
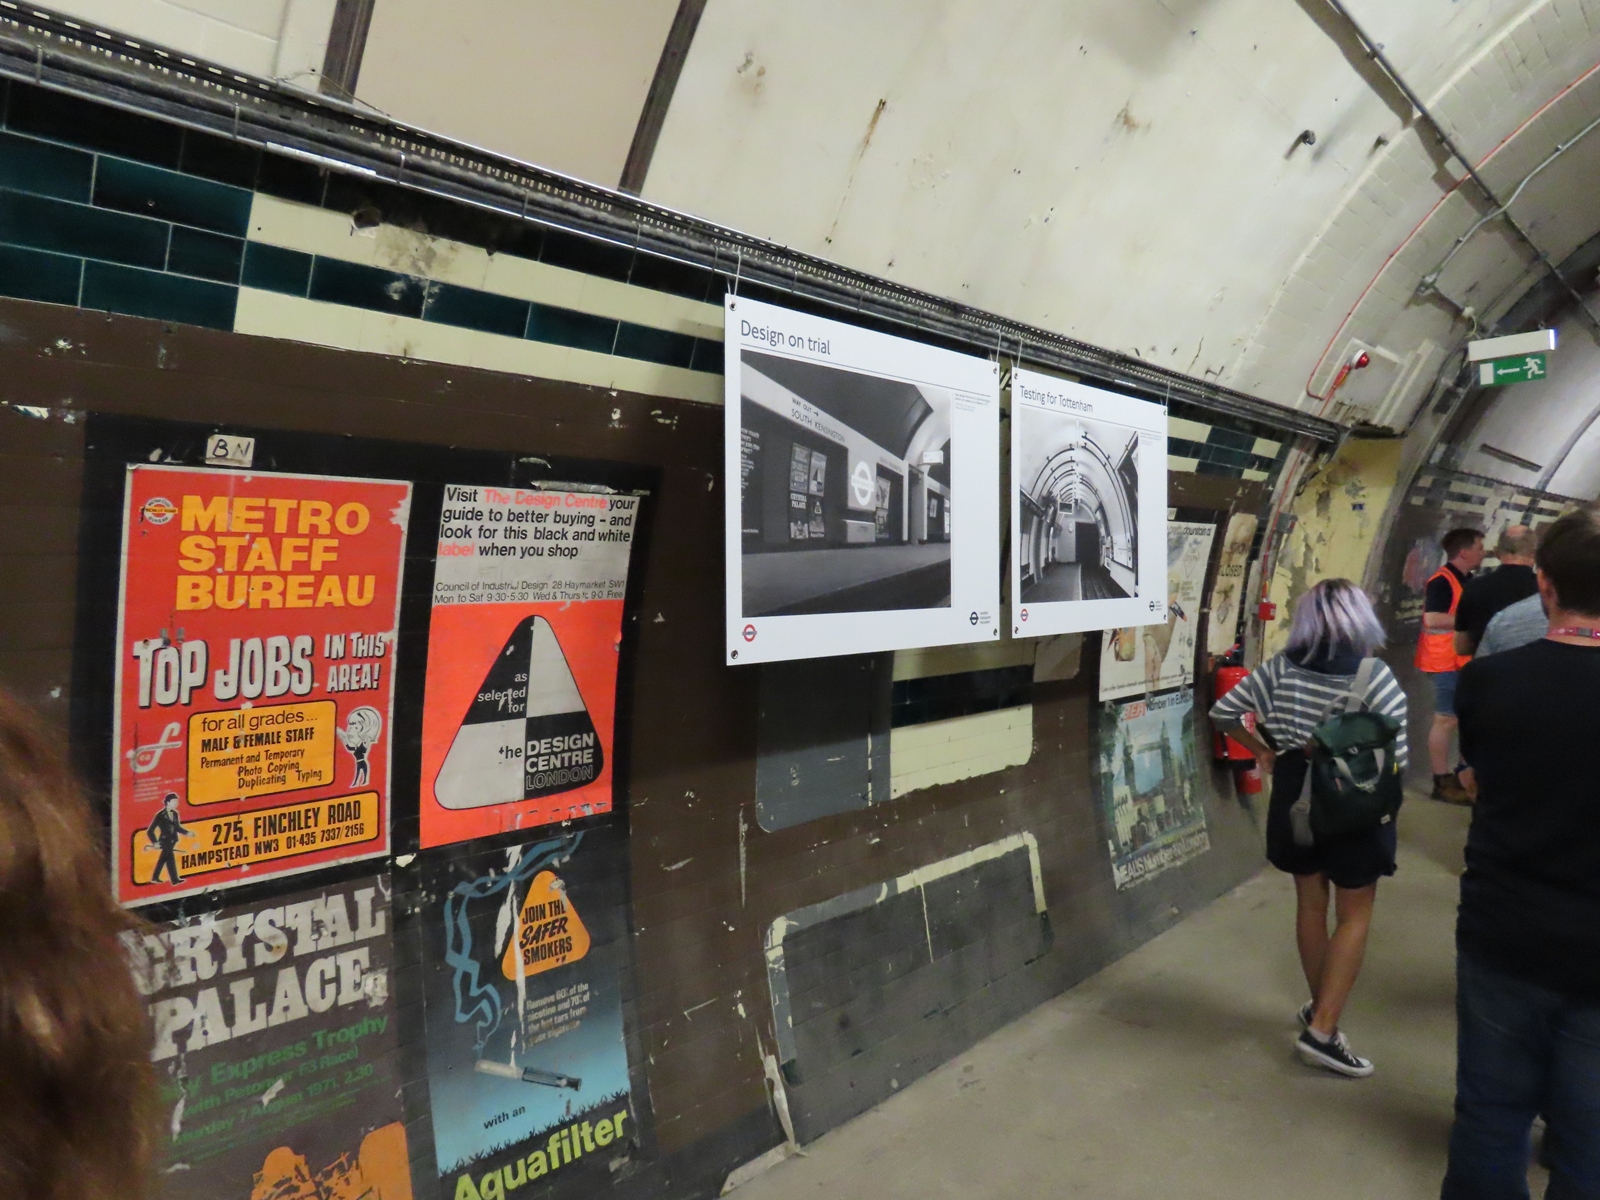
We soon saw evidence of how this area had been used as a testing ground for new tiling schemes.
These 1980s’ tiles with their thick grouting contrast sharply with the 1907 tiling visible further up the stairs.
Upon reaching the second platform, we were told of its very important use for storing artefacts during the War years, before being shown the remains of the run-off tunnel.
All traces of the tiling were long gone from the Holborn end of this platform.

The brick wall for this tunnel can just be seen at the far end.
This tunnel was also home to the world’s loneliest chair!
Despite being abandoned for 96 years at the time of the tour, the tiled ring above us was still intact. The plaster applied to the headwall was cracked in places, revealing the brickwork behind it.
To the side of the tunnel, the start of another passageway could be seen. Again, this never opened to the public and was presumably hidden from view during the ten years that this platform was in use.
Without tiles or even plaster applied, it is interesting to notice where the passageway is constructed using tunnel rings, and where it is constructed using bricks.
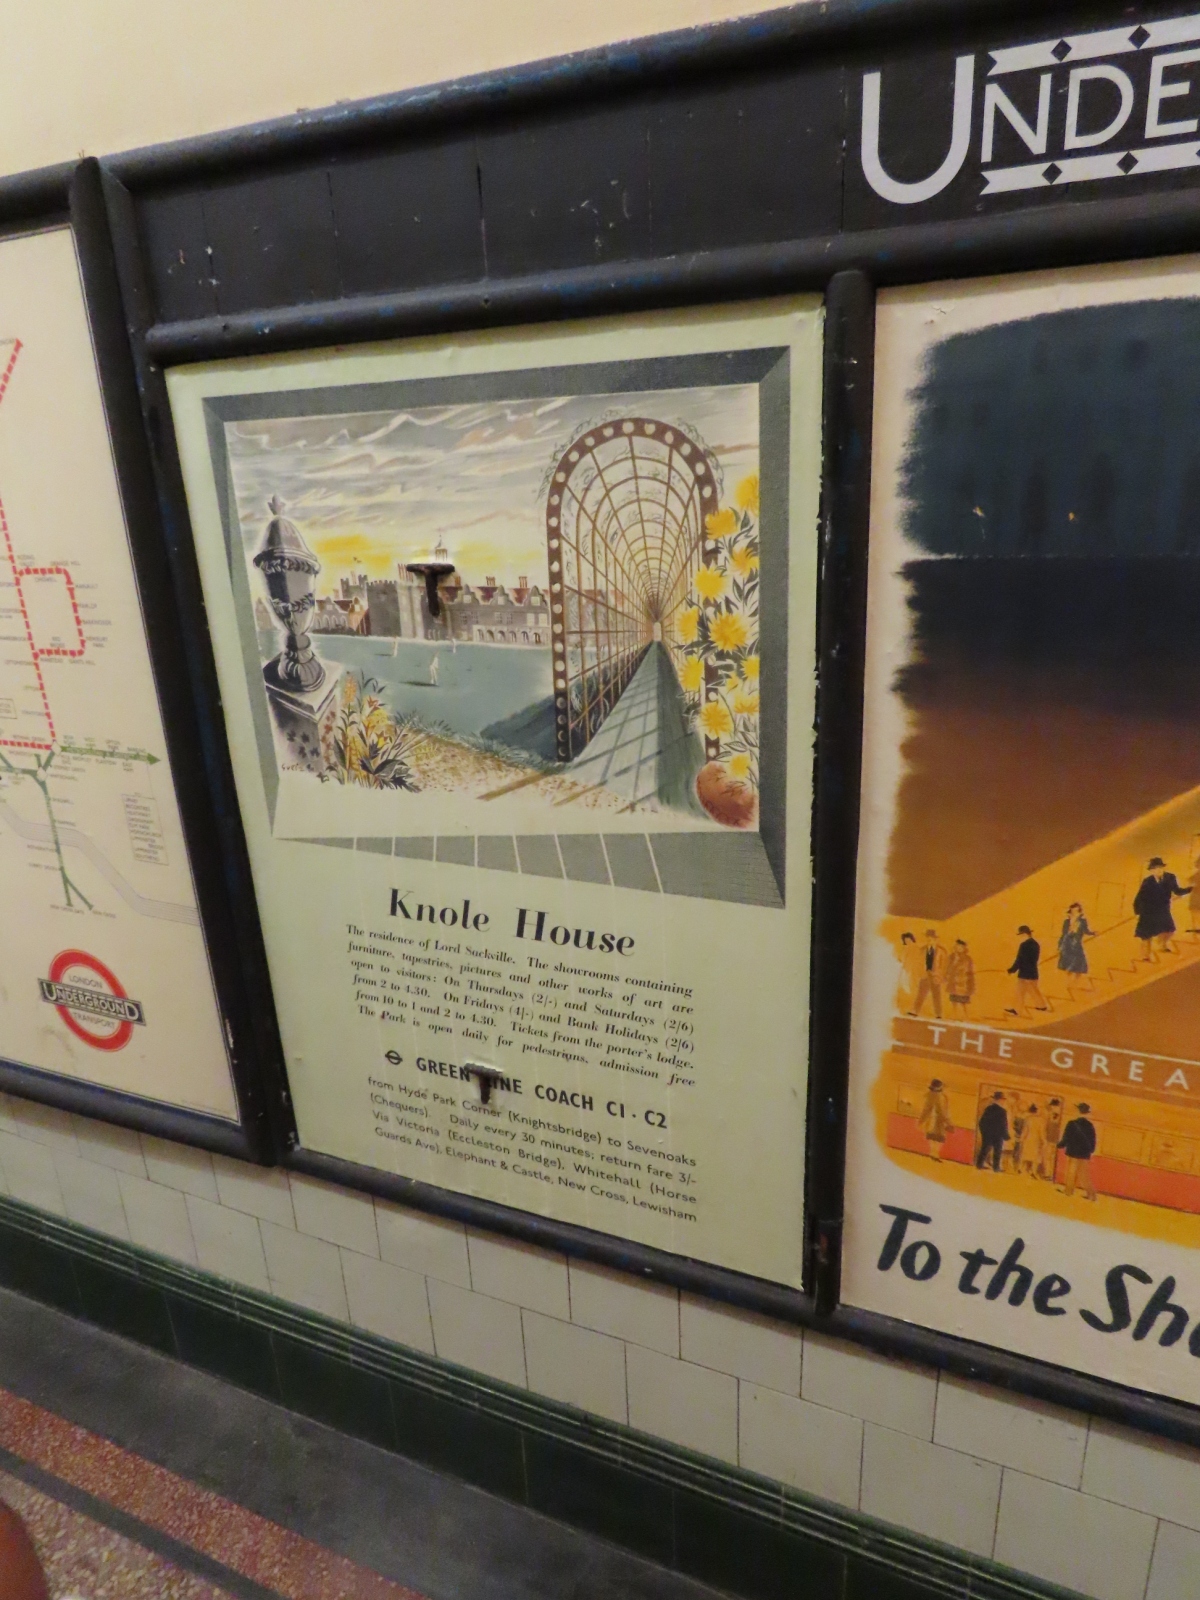
Back on the platform, more evidence of tile trials existed. The original ‘Strand’ name can just be discerned, although many of the tiles that made up this detail have, sadly, been removed.
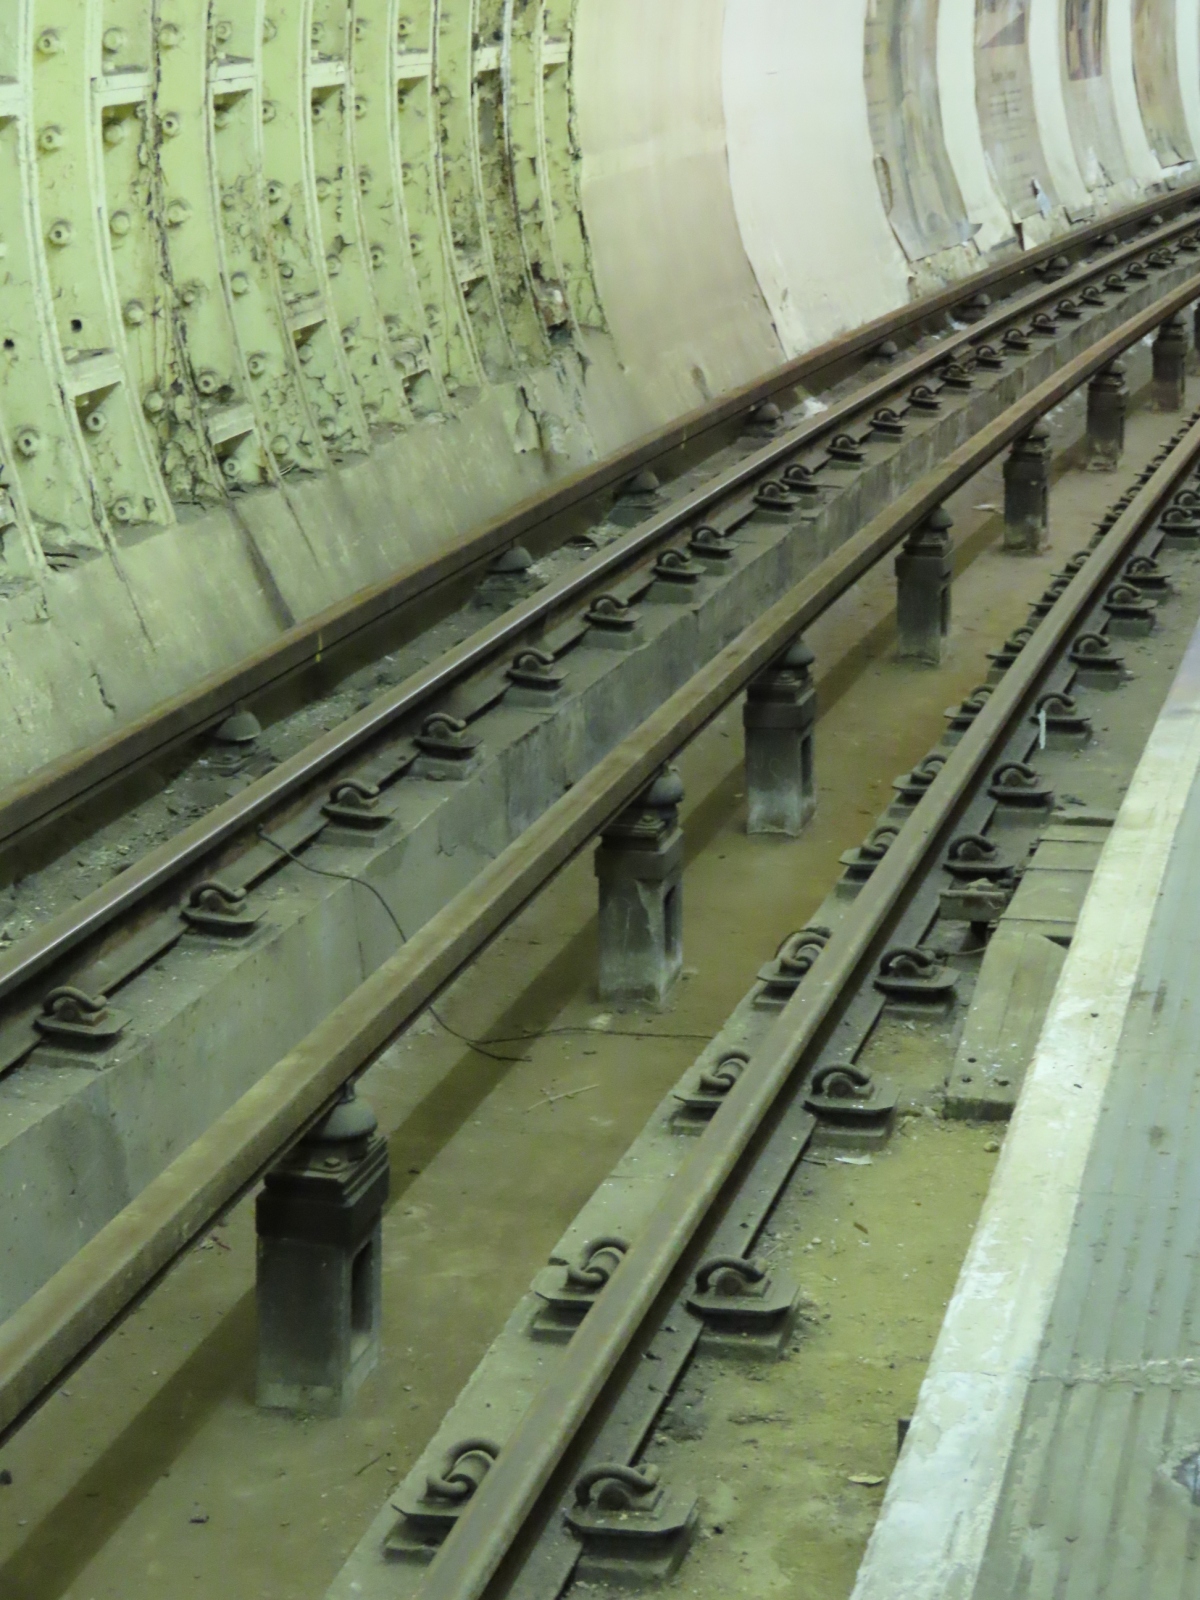
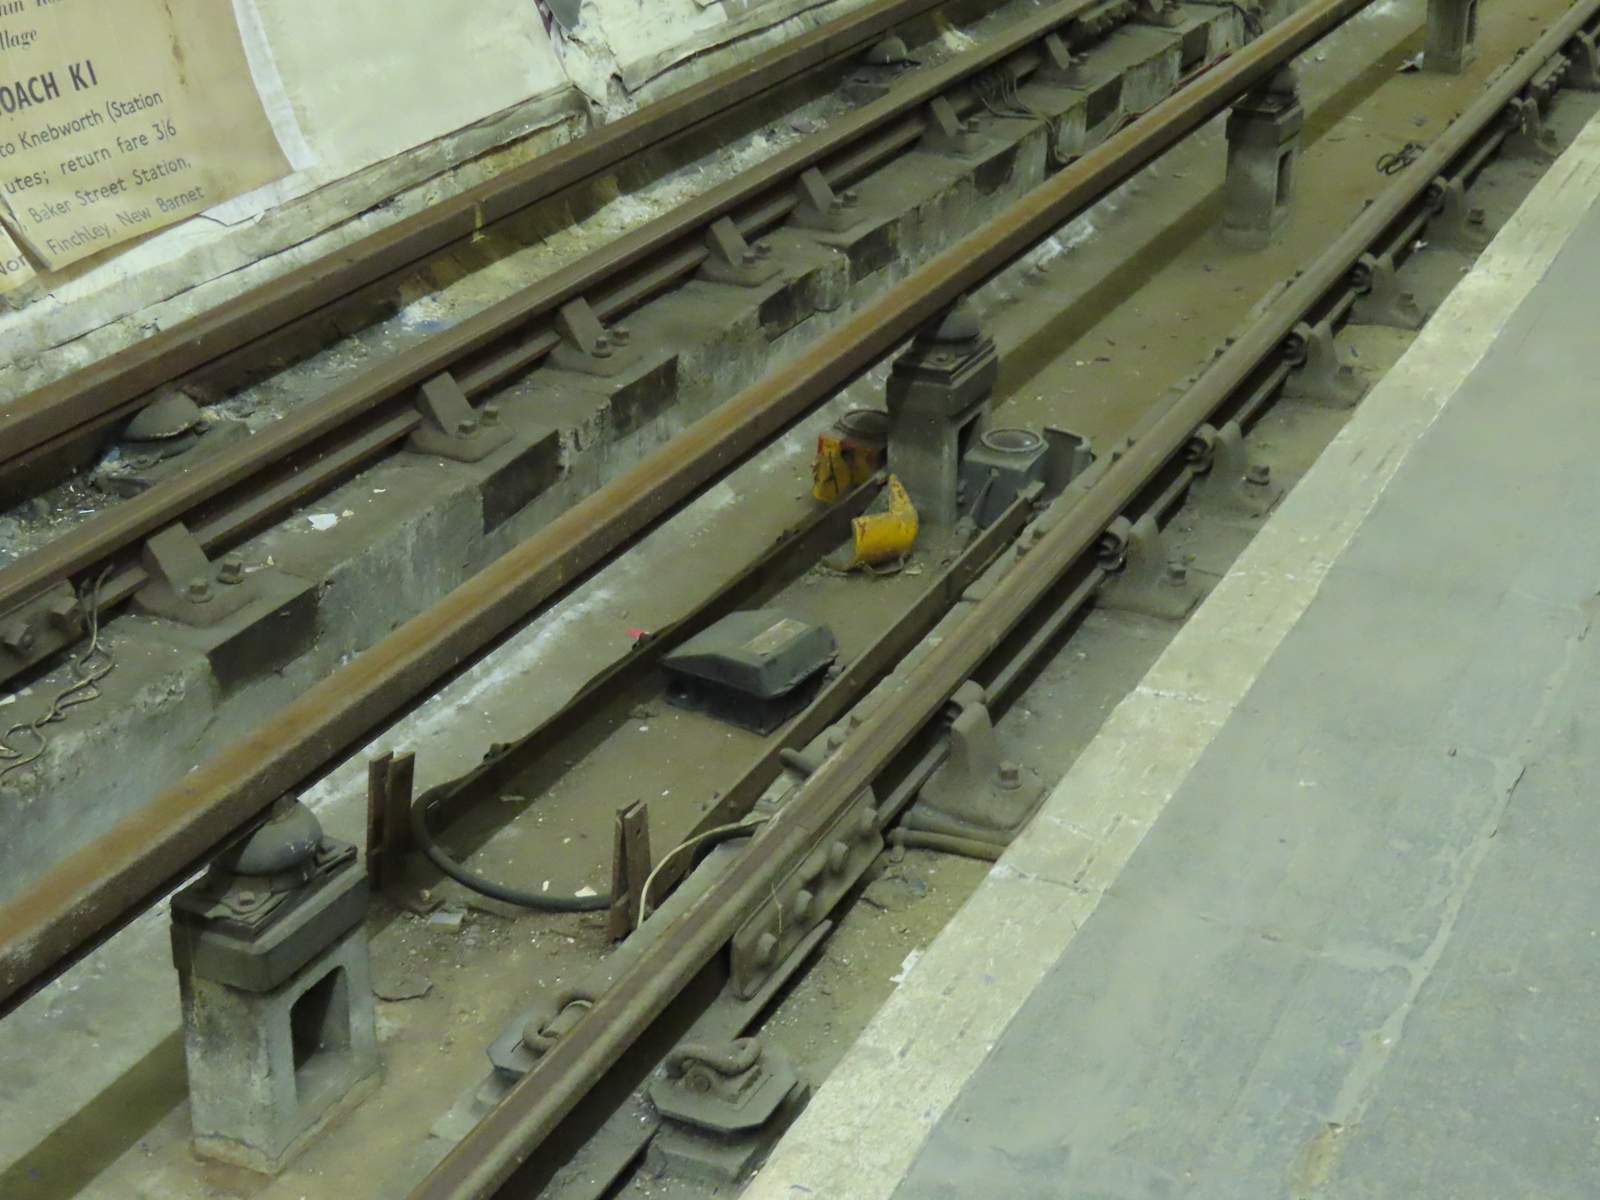
A short section of original track still exists - the square-based conductor rail insulators apparently carry listed status!
Aside from some panelling being applied to the tunnel ring segments on the opposite side of the platform, very little had changed around the rails.
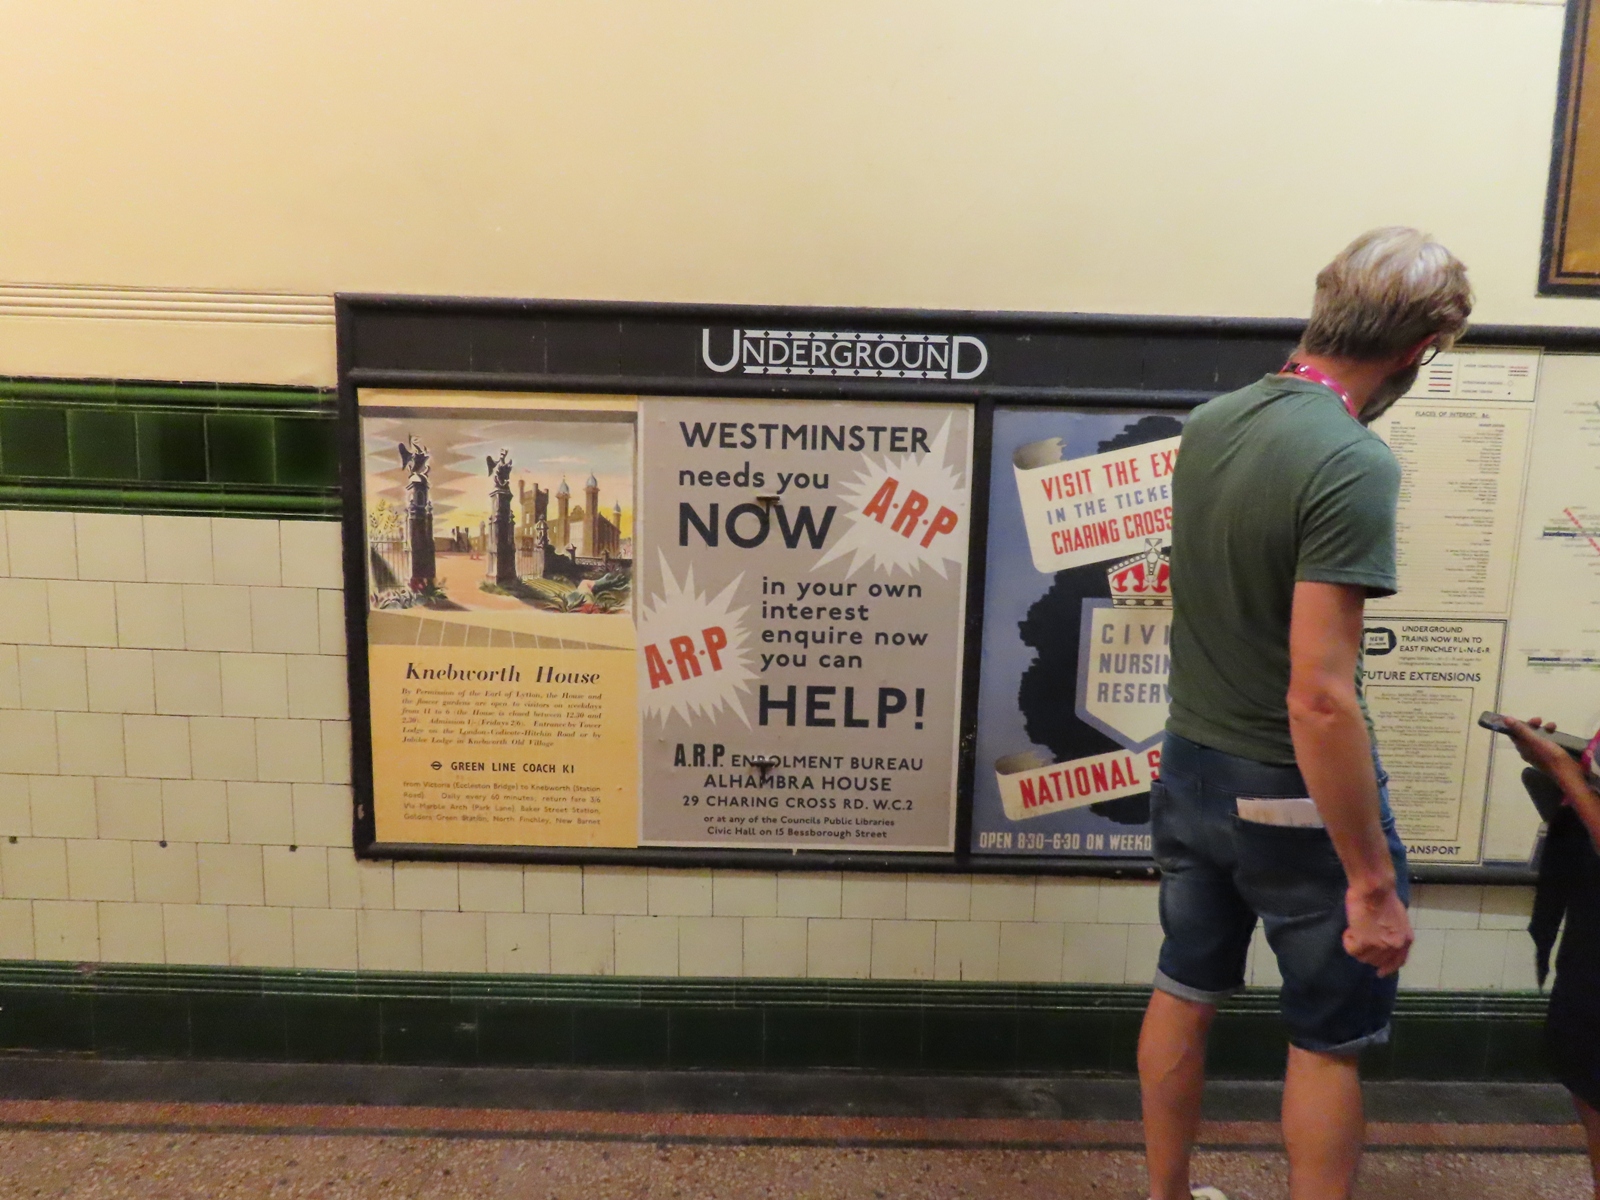
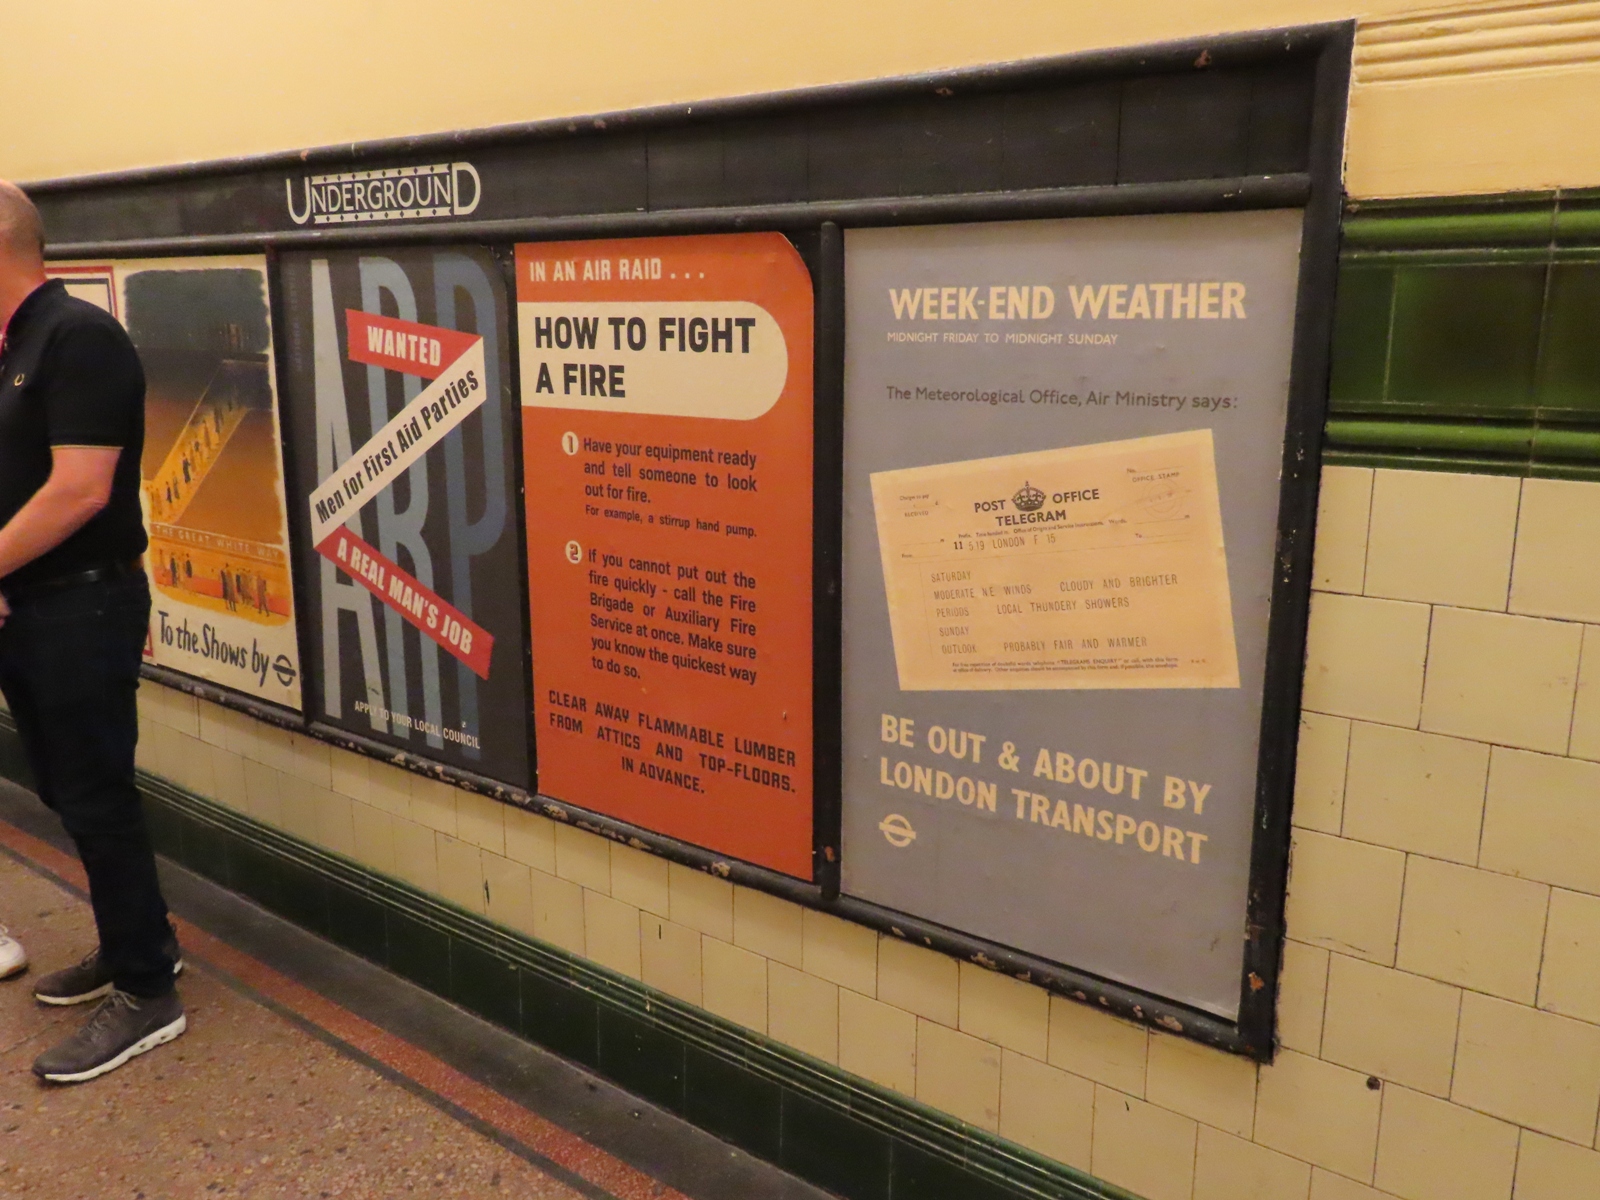
A number of posters dating from the 1970s are also present along this platform.
The ‘Strand’ naming was in better condition at this end of the platform.
A popular poster for photography was the one promoting the virtues of Britain joining the Common Market...hindsight, as they always say, is a wonderful thing!
Four very different posters are shown here...and not one of them has a website listed! The one positioned bottom-right would not be seen these days!
A board showing a 1970s’ photograph depicting platform mock-up for South Kensington was positioned alongside these posters - the posters were part of the mock-up and date from then. Anything coloured brown here (this was definitely the 1970s!) was visible in the mock-up; anything unpainted was concealed by panelling. The area immediately behind the board was the home of a backlit roundel, while the space below it was occupied by a litter bin.
Looking towards the Holborn end of the platform, we see a set of double doors in the former trackbed area. The apparent presence of asbestos behind them ensured that they remained firmly shut throughout the tour! I also notice rather a lot of spectral orbs in this picture...the ghosts are back!
Looking back the other way, we see the bare platform walls; the result of the platform being used for many design schemes over the years.
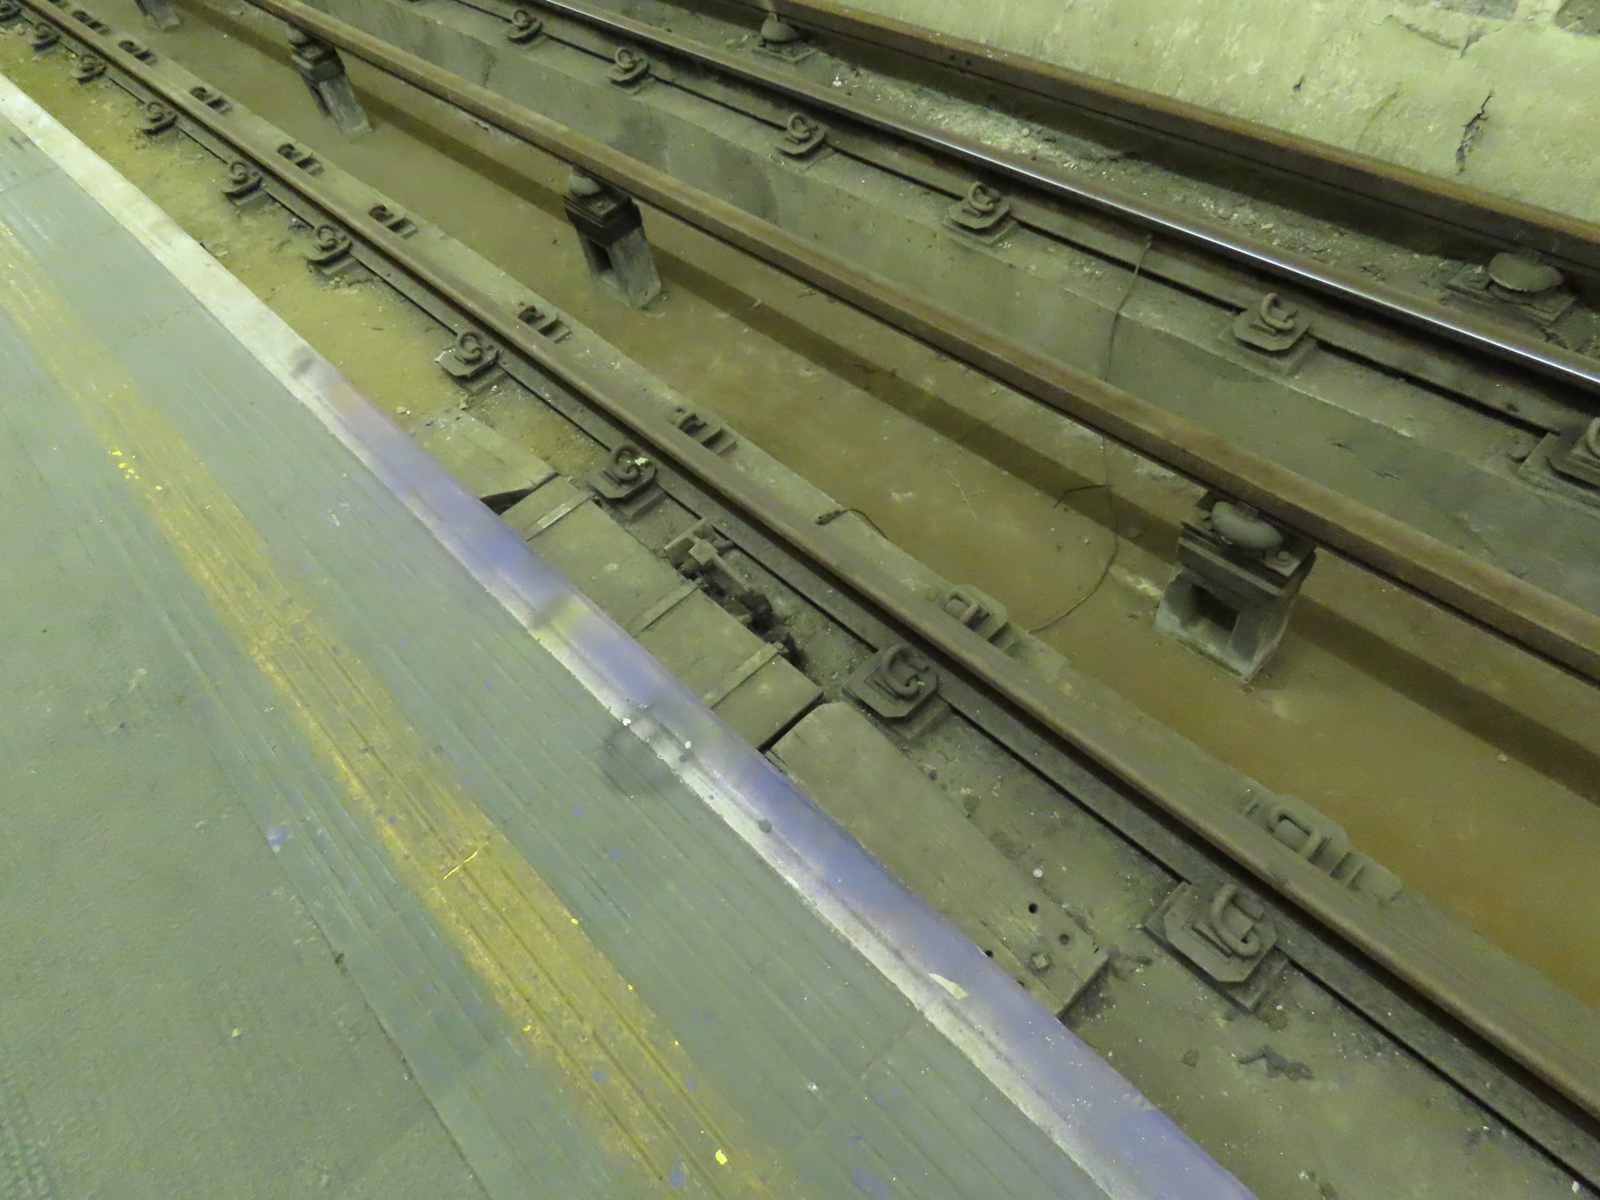
These rails appear rather ungainly in comparison to modern rails, although in reality, they are probably around the same size.
Heading back up the stairs, I took one final picture of the different tiling designs, at the same time as others had decided to do likewise!
The bridge over the two tracks, from the other direction.
The passageway to the lift areas is slightly offset - no doubt this was a necessity at the time of the station’s construction, owing to land constraints, and the need for keeping the railway directly beneath public streets where possible, in order to remove the need to compensate the owners of buildings directly above.
Another view into one of the lift shafts that was never used.
The tour then took us to the parts of the station that had never been furnished and never opened for passenger use.
This view is of the other side of the closed passageway that was seen earlier at the end of Platform 1. The run-off tunnel exists behind the wall to the right.
This would have been the entrance to the platform that closed in 1917. The run-off tunnel is now located behind the wall to the left.
This dead-end passageway would have linked up with the never-used corridor behind the lifts.
Whilst in the never-used area, a possible explanation for the presence of the spectral orbs is made...
Returning to the ‘open’ areas, some rather confusing signage was pointed out to our group - the Bakerloo line does not and has never called at Aldwych! In reality, this sign was added when the station was being used as a location for some of the many films that it has featured in over the years.
Perhaps the sign does carry some truth, after all - the quickest way to reach the Bakerloo line probably would be to ascend the emergency stairs and then walk to either Charing Cross or Embankment stations!
|
The un-furnished passageways are hidden behind this innocuous metal door, which is located to the right of the spiral stairs in the above picture. |
Just before we headed back up the stairs, the old station had one last trick up its sleeve - certain surfaces had been coated in luminous paint, in order to assist people in exiting the station in the event of an electricity failure.
Never look up at the underside of an underground spiral staircase - doing so will simply alert you to how far you will have to walk in order to be back at ground level!
Thankfully, these stairs are a relatively short climb!
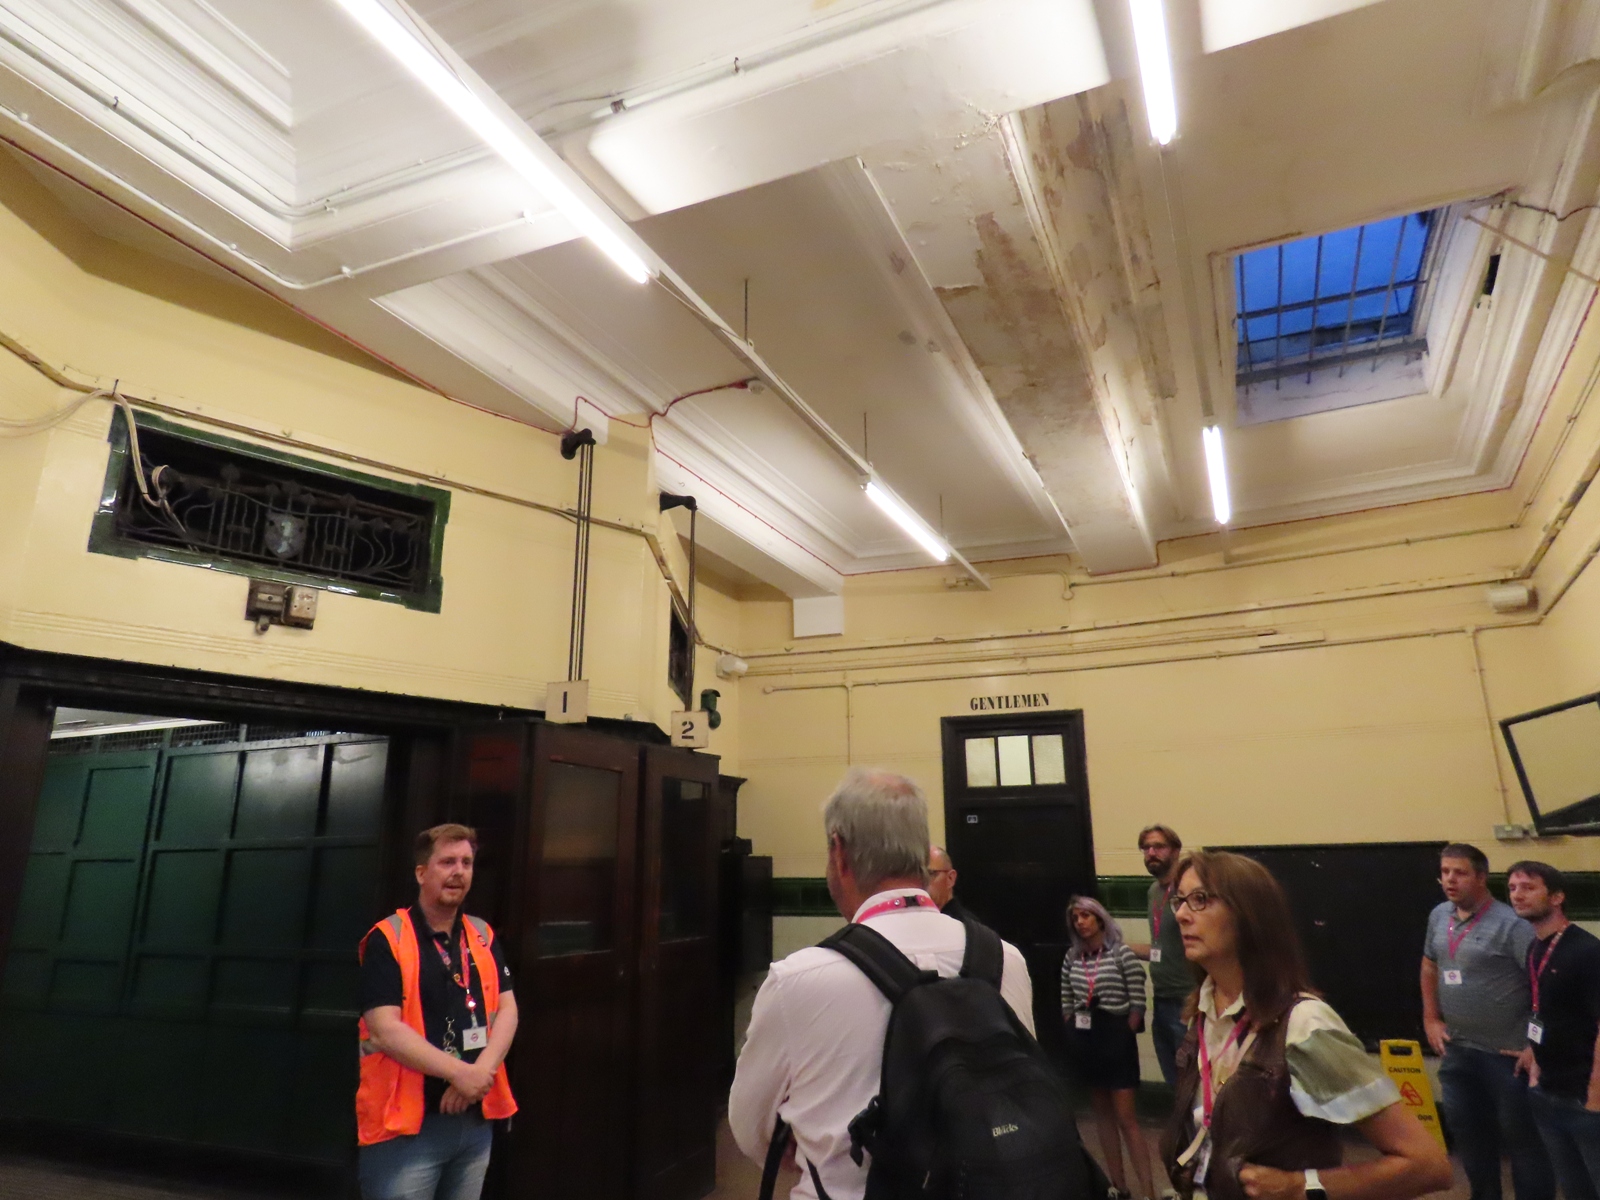
Back at the ticket hall, we had just enough time to take a few more pictures. The replacement ticket office is placed on top of one of the disused lift shafts; the actual original ticket hall being located around the corner. The main difference between this image and the one taken in 2022 is the wearing of much heavier clothing in 2013, owing to the tour occurring much later in the year.
The lift car indicators were pointed out at this stage. Curiously, both indicators were located at the bottom of their respective tracks, which would signify that both cars were at the lower level; however, as can be seen, both were, in fact at ticket hall level!
Aaron, one of our guides on the 2022 tour, discusses the station being equipped with three separate lift shafts, when only one of these ever accommodated lift cars and machinery.
Some rather antiquated controls (although not as old as the lifts themselves) were situated alongside the lift cars.
If ever you have wondered why Tube station lifts are always arranged in pairs, this discussion should explain all.
Our group piled into one of the lift cars - there were probably more people in it here than there had been whilst the station was operational!
The ‘secret door’ in the side of the car, allowing access to the other one in the event of an emergency.
A small electric heater was installed for the comfort of the lift operator...hmm, something that generates heat in something that is constructed of wood and could stop with only limited escape access? I’m sure that that would be fine!
The position of the lift operator’s desk (from where tickets were issued) could still be seen on the floor.
The ‘secret’ door from another angle, and the other lift car beyond.
An old directional sign was still extant on the other side of the lifts.
The other side of the lifts was also home to some heavy wooden panelling.
Unlike the stylish grilles facing the ‘entrance’ side of the lifts, the grilles on the ‘exit’ side were far more mundane.
The lift seemed surprisingly spacious when unoccupied.
![]()
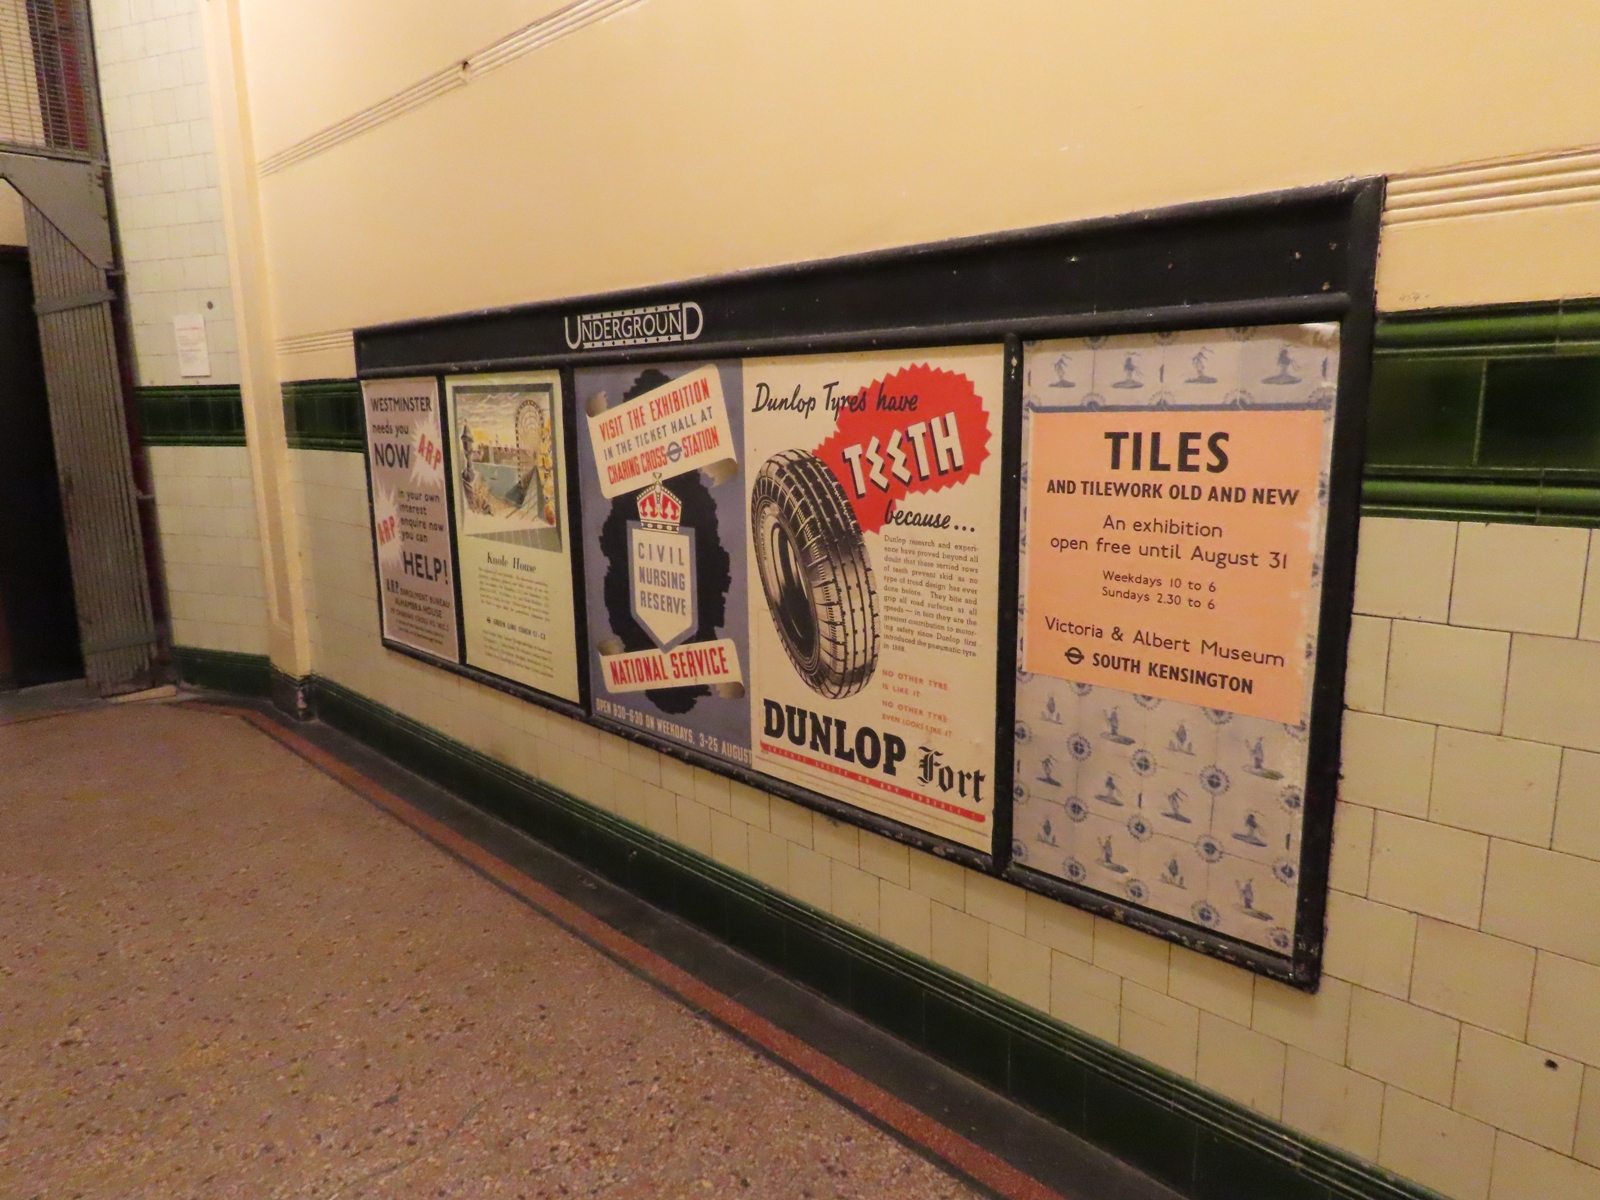
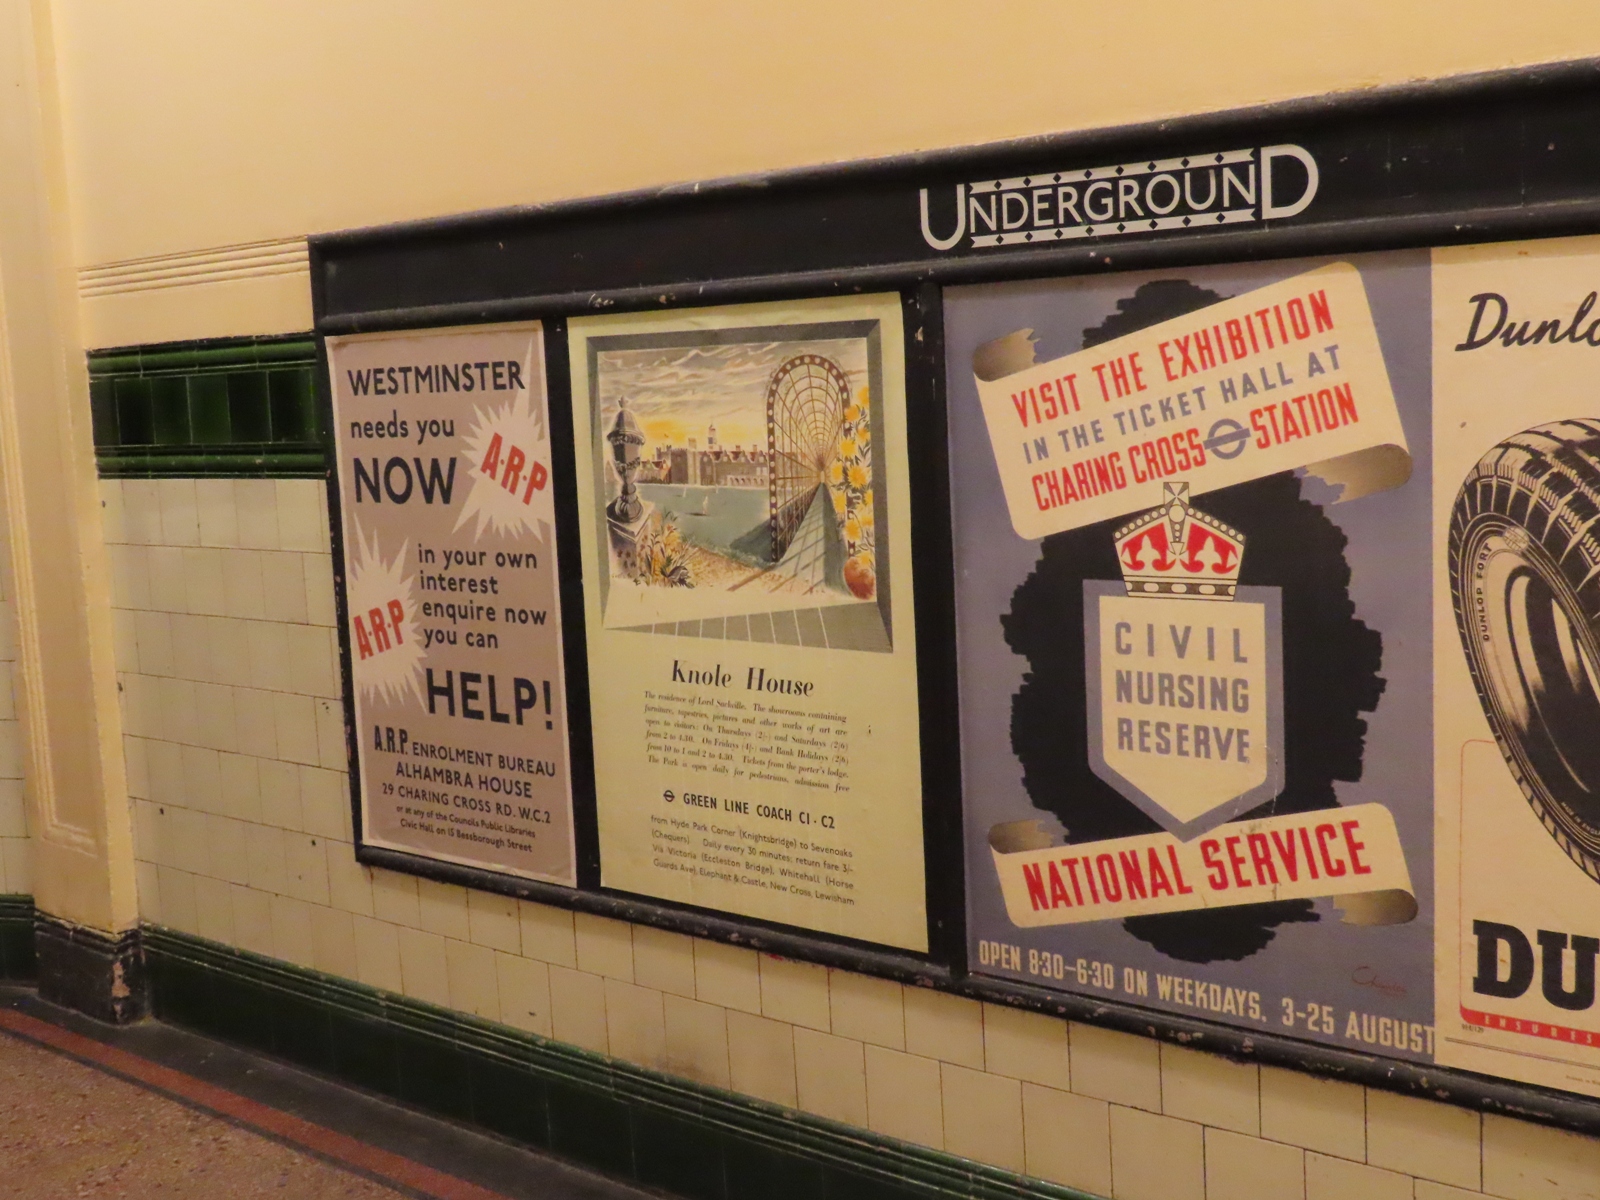
A variety of replica posters dating from the Second World War had been applied to the wooden friezes situated in the exit corridor.
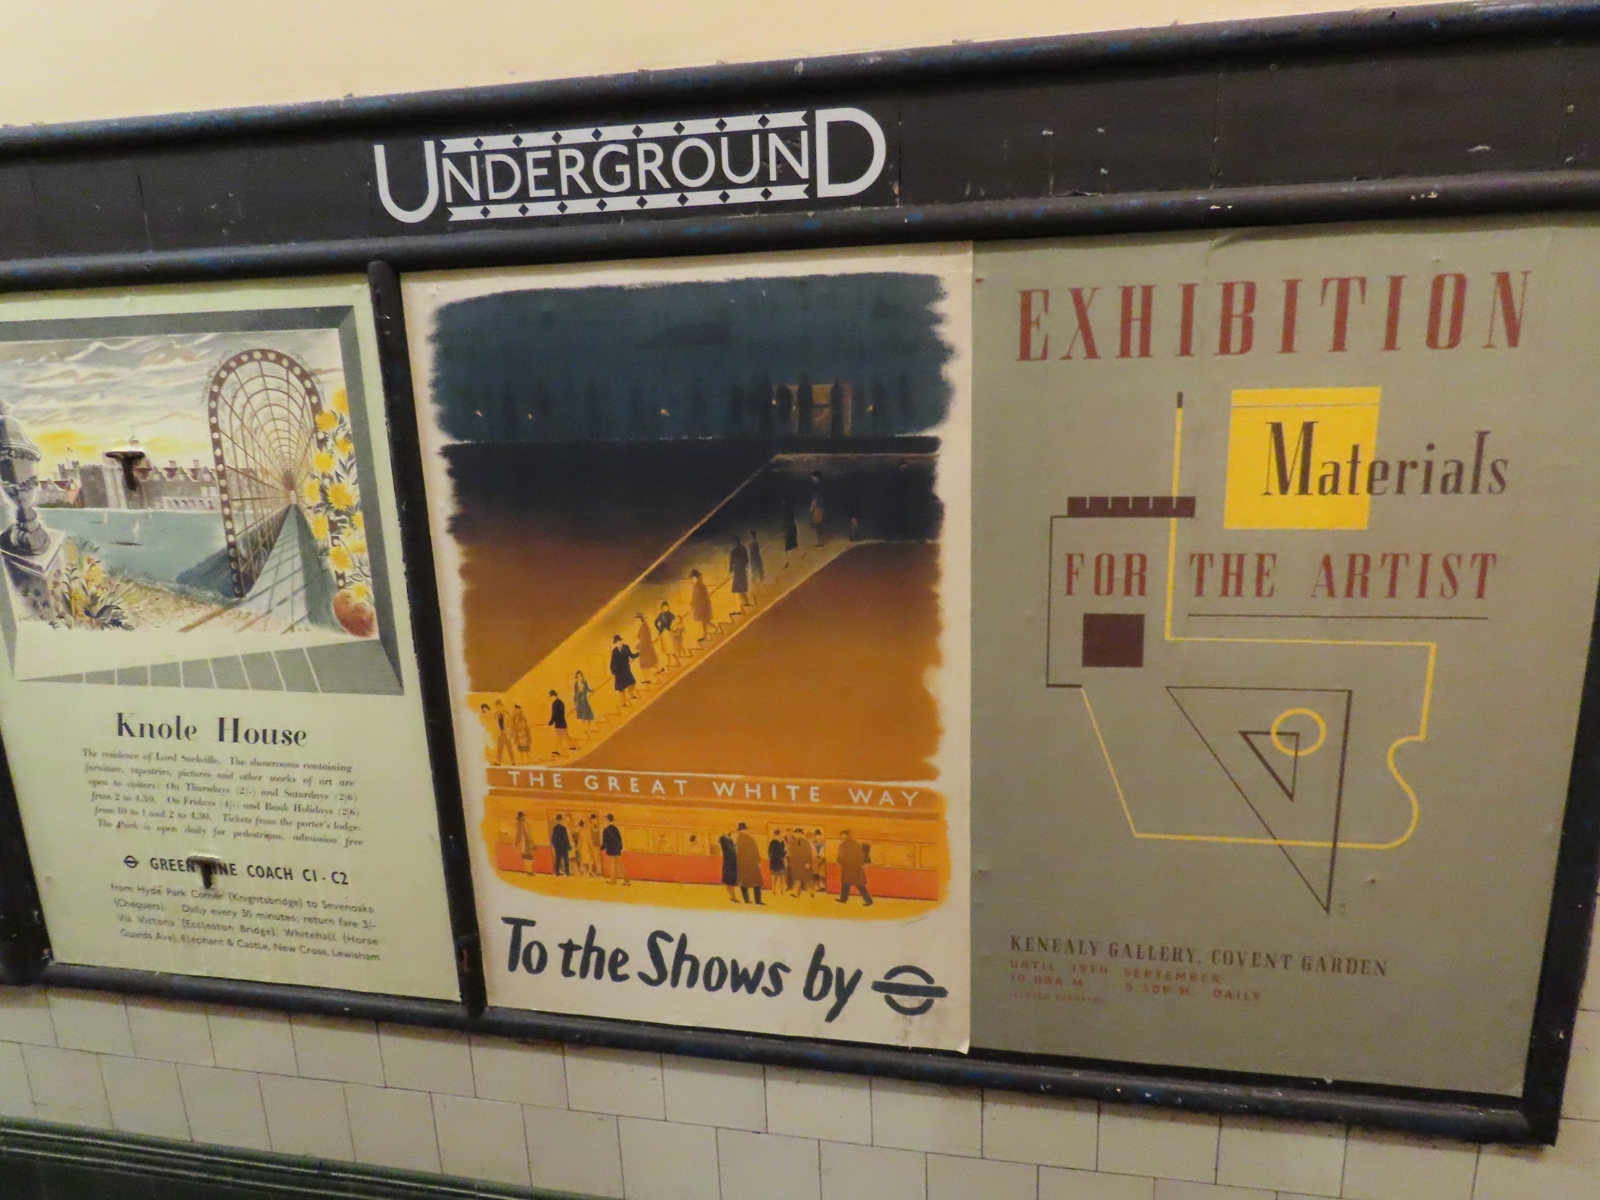
The eastern side of a 1940s’ map is visible to the left of the picture, with much of the Central line in this area depicted as being under construction. In reality, some of the new stations and tunnels constructed for the extension served as a secret munitions factory during hostilities.

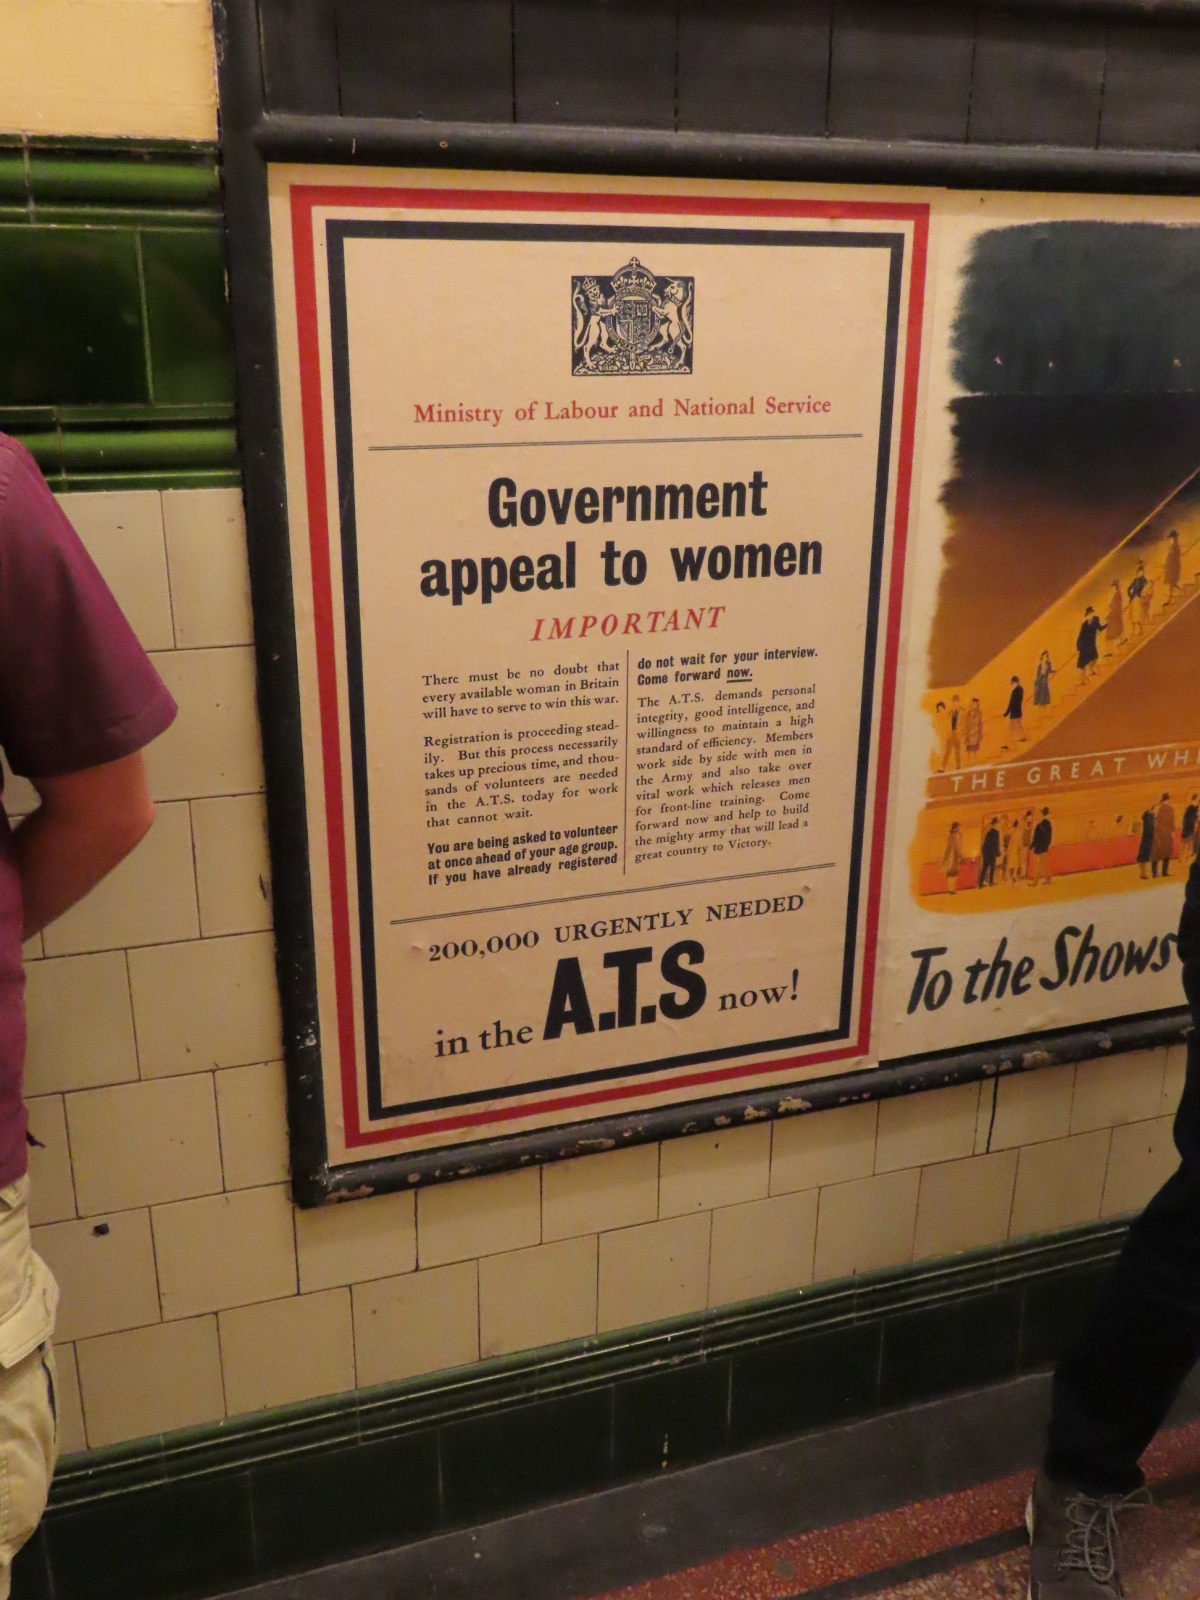
Ironically, one of the posters advertised "Tiles and Tilework old and new"; the tiles surrounding the frieze being very much in the former of those two categories!
Despite being over 100 years old, the ‘Exit’ sign above the door was still relevant!
The ‘Entrance’ door probably less so!
The darkened façade of the station on a cold November evening.
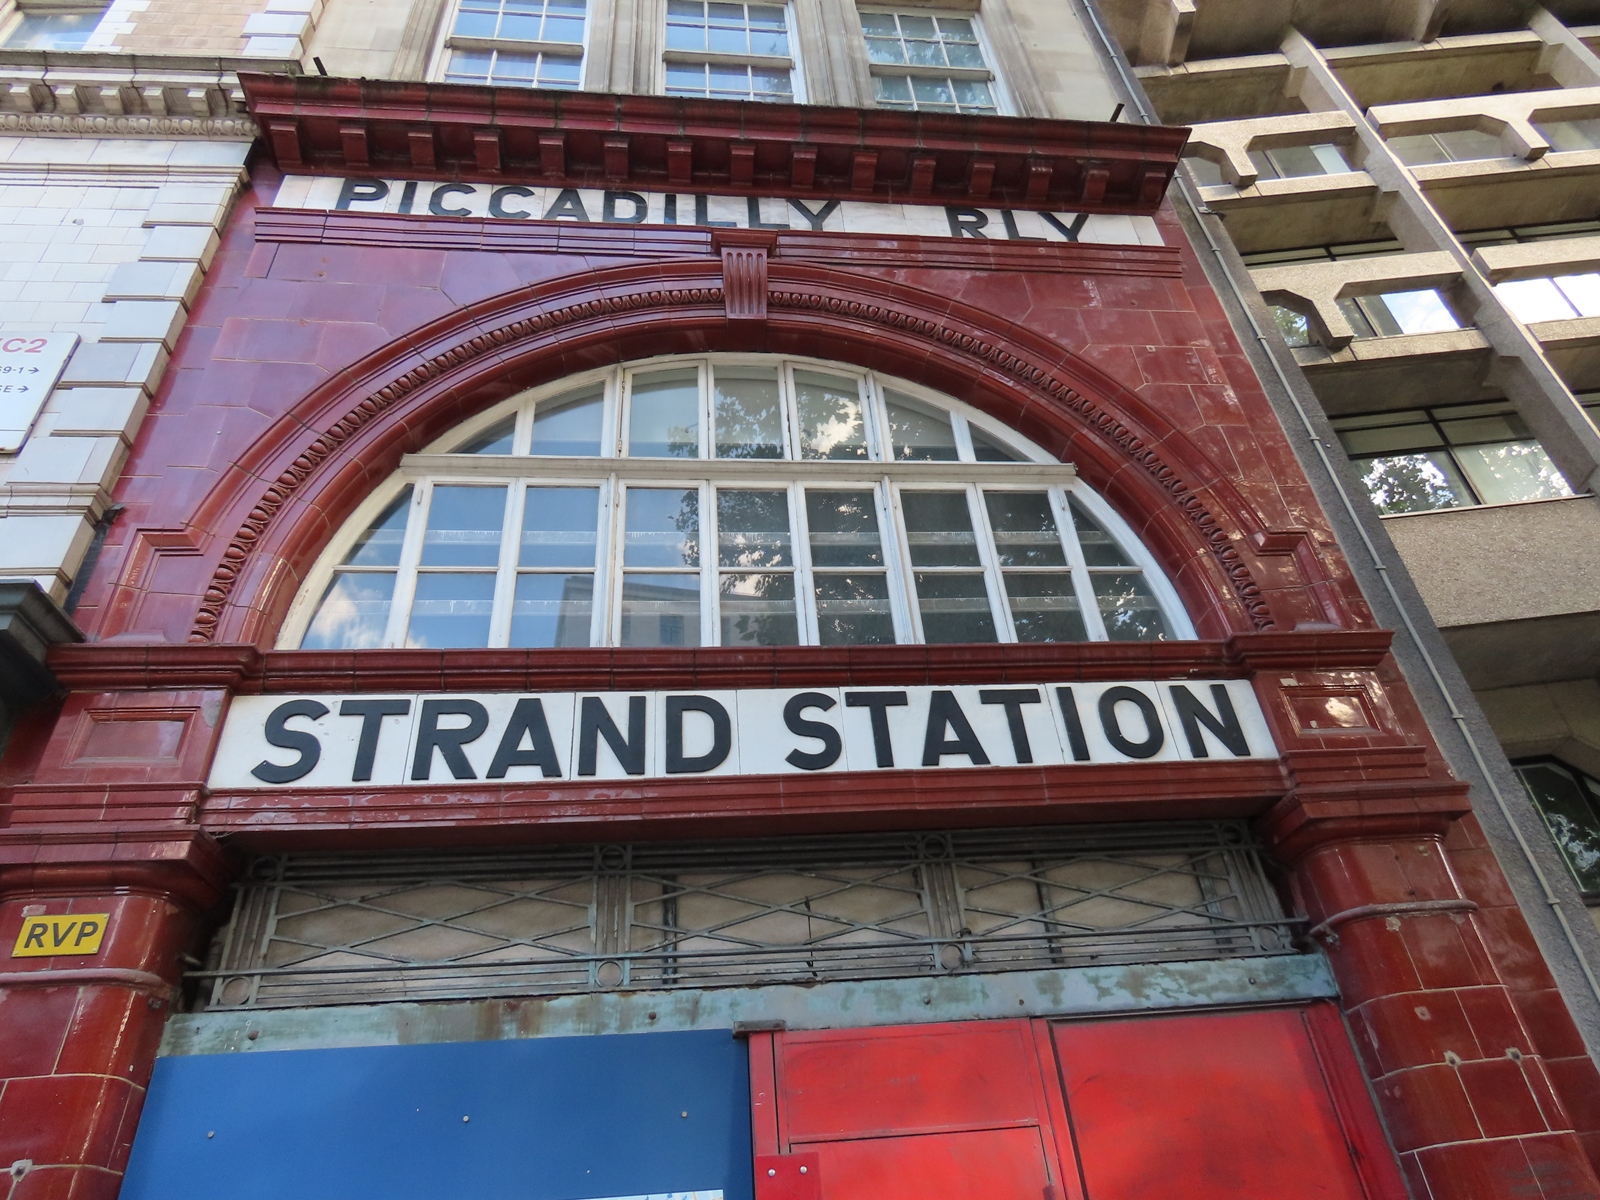
The oxblood-red tiles looked all the more resplendent in 2022 daylight. An early modification made to this frontage was to change "Piccadilly Tube" to "Piccadilly Rly". The large first floor window was originally curved (in typical Leslie Green fashion), while the central white panel below it was home to "Strand Station" lettering.
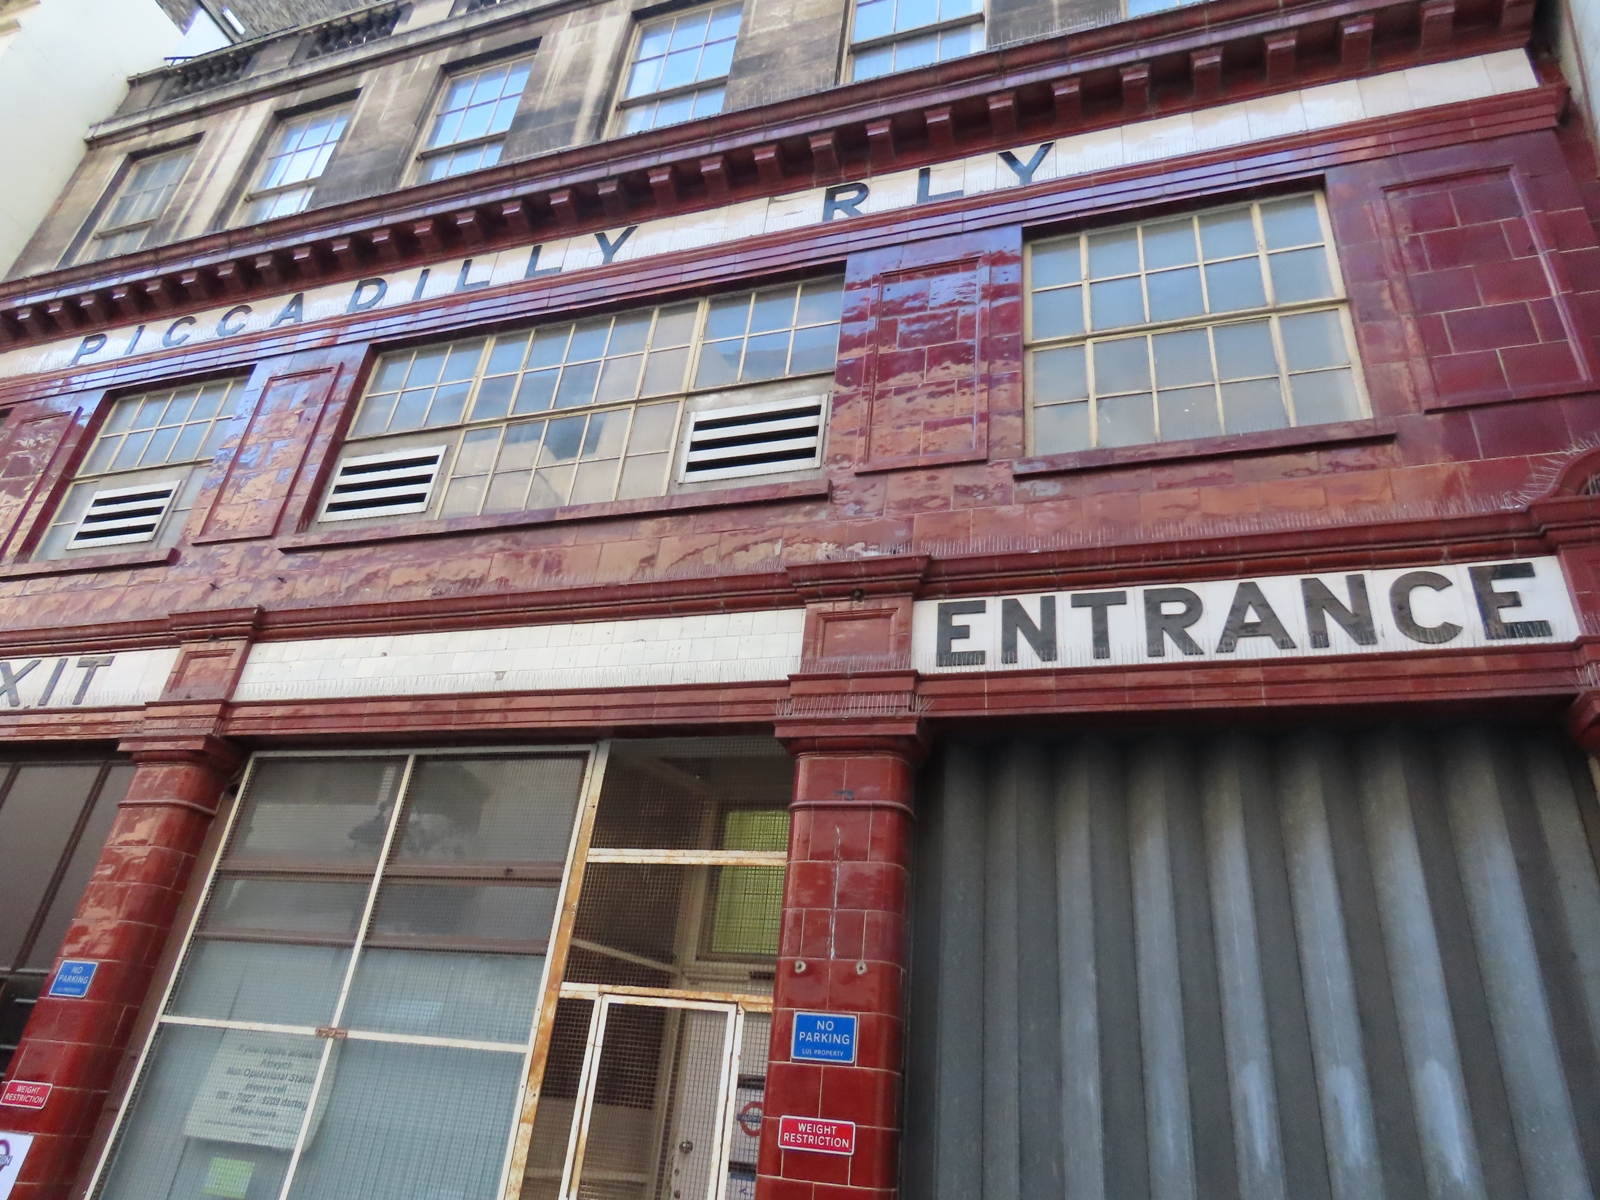
The Strand entrance, however, was in more original condition - this retained its original curved window. I am not certain as to whether the "Rly" lettering here was changed, however. For much of the station’s life, an ornate iron and glass canopy obscured the "Strand Station" naming, with "Aldwych Station" being displayed at the front of the canopy. In a rather timely fashion, the old canopy collapsed shortly after the station closed, revealing the original name once again.
Thank you to everyone responsible for arranging this tour (on both occasions!); it was definitely worth the effort of traversing the spiral staircase twice!
Additional videos made during the 2013 tour are viewable on this page.